FREE PATTERN: Lybstes Baby-Jacket Size 56 - 68 | 0 - 3 months
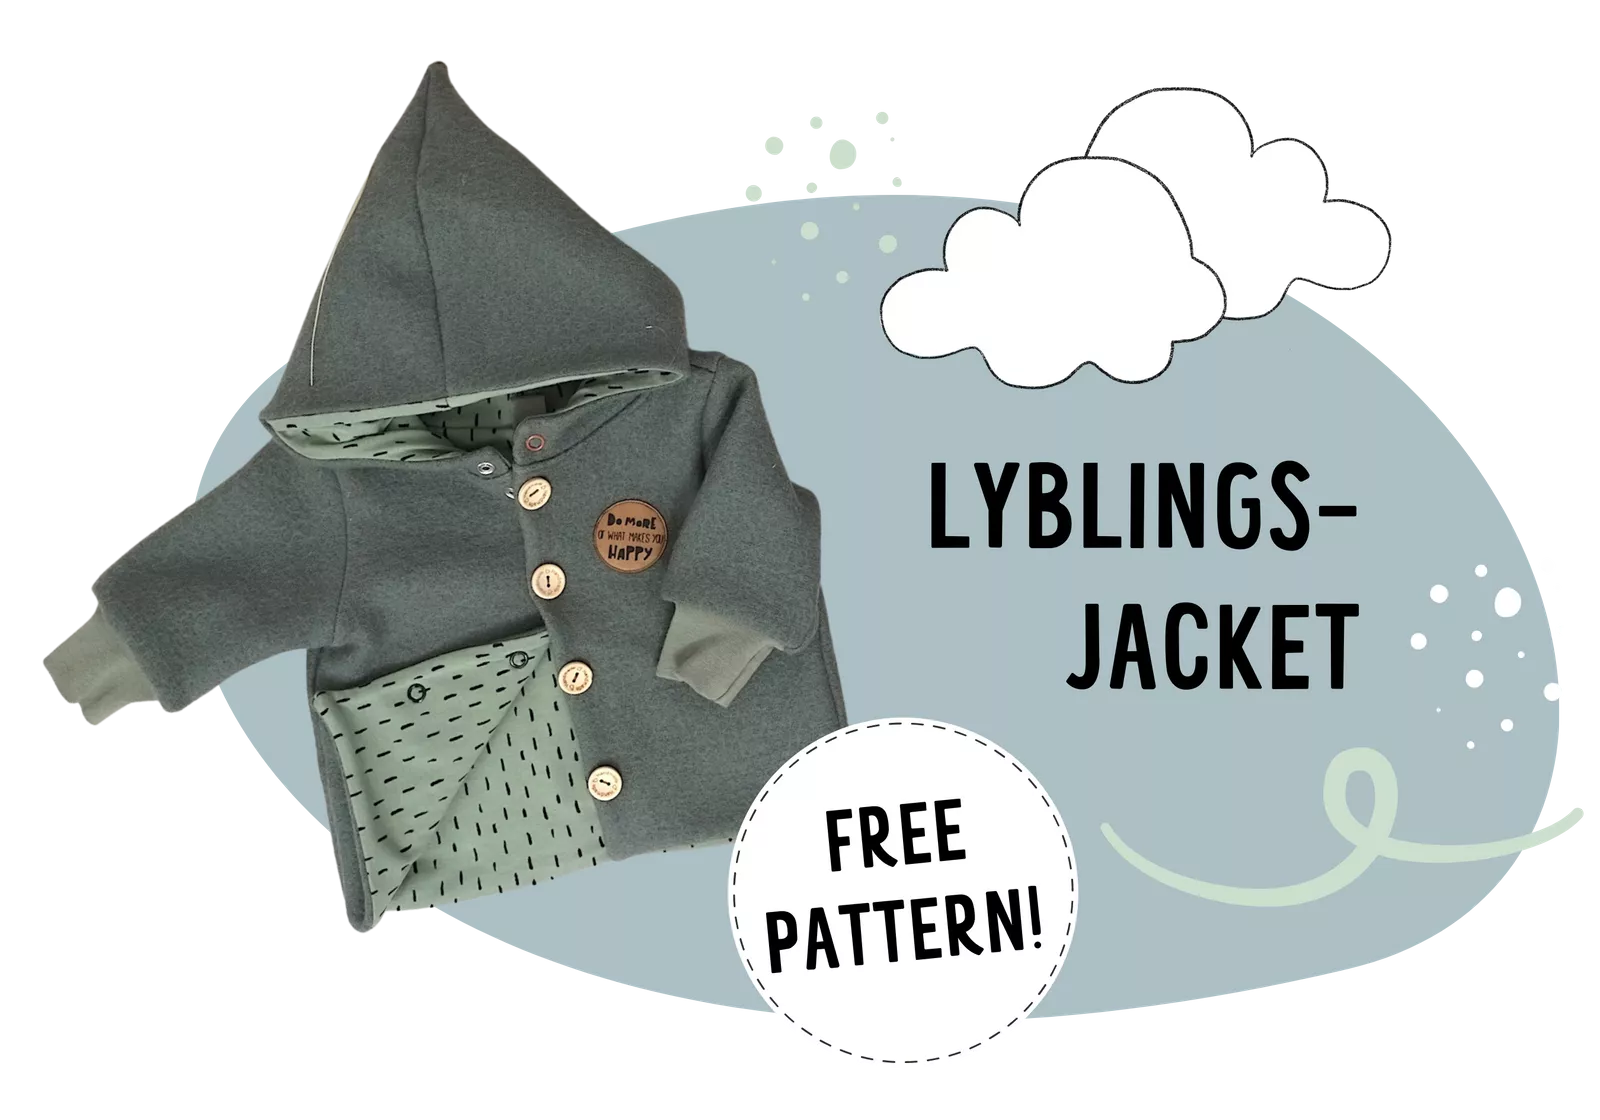
This jacket is a basic pattern that is suitable for boys and girls. It is the perfect first jacket sewing project. However, by adding some details it will look very professional nonetheless. You'll find two instructions in this blog post! One is for a jacket with a zipper and one is for a jacket with buttons. Just scroll till the end of the blog post and see, what you like more.
The European sizes are based on the child’s height measured in centimeters. In the ebooks, the sizes are indicated in both ways, centimeters, and inches of course. Also, the fabric requirement is listed in centimeters and yards. The European size of 56 - 68 corresponds to the UK or US size of 0 - 3 months.
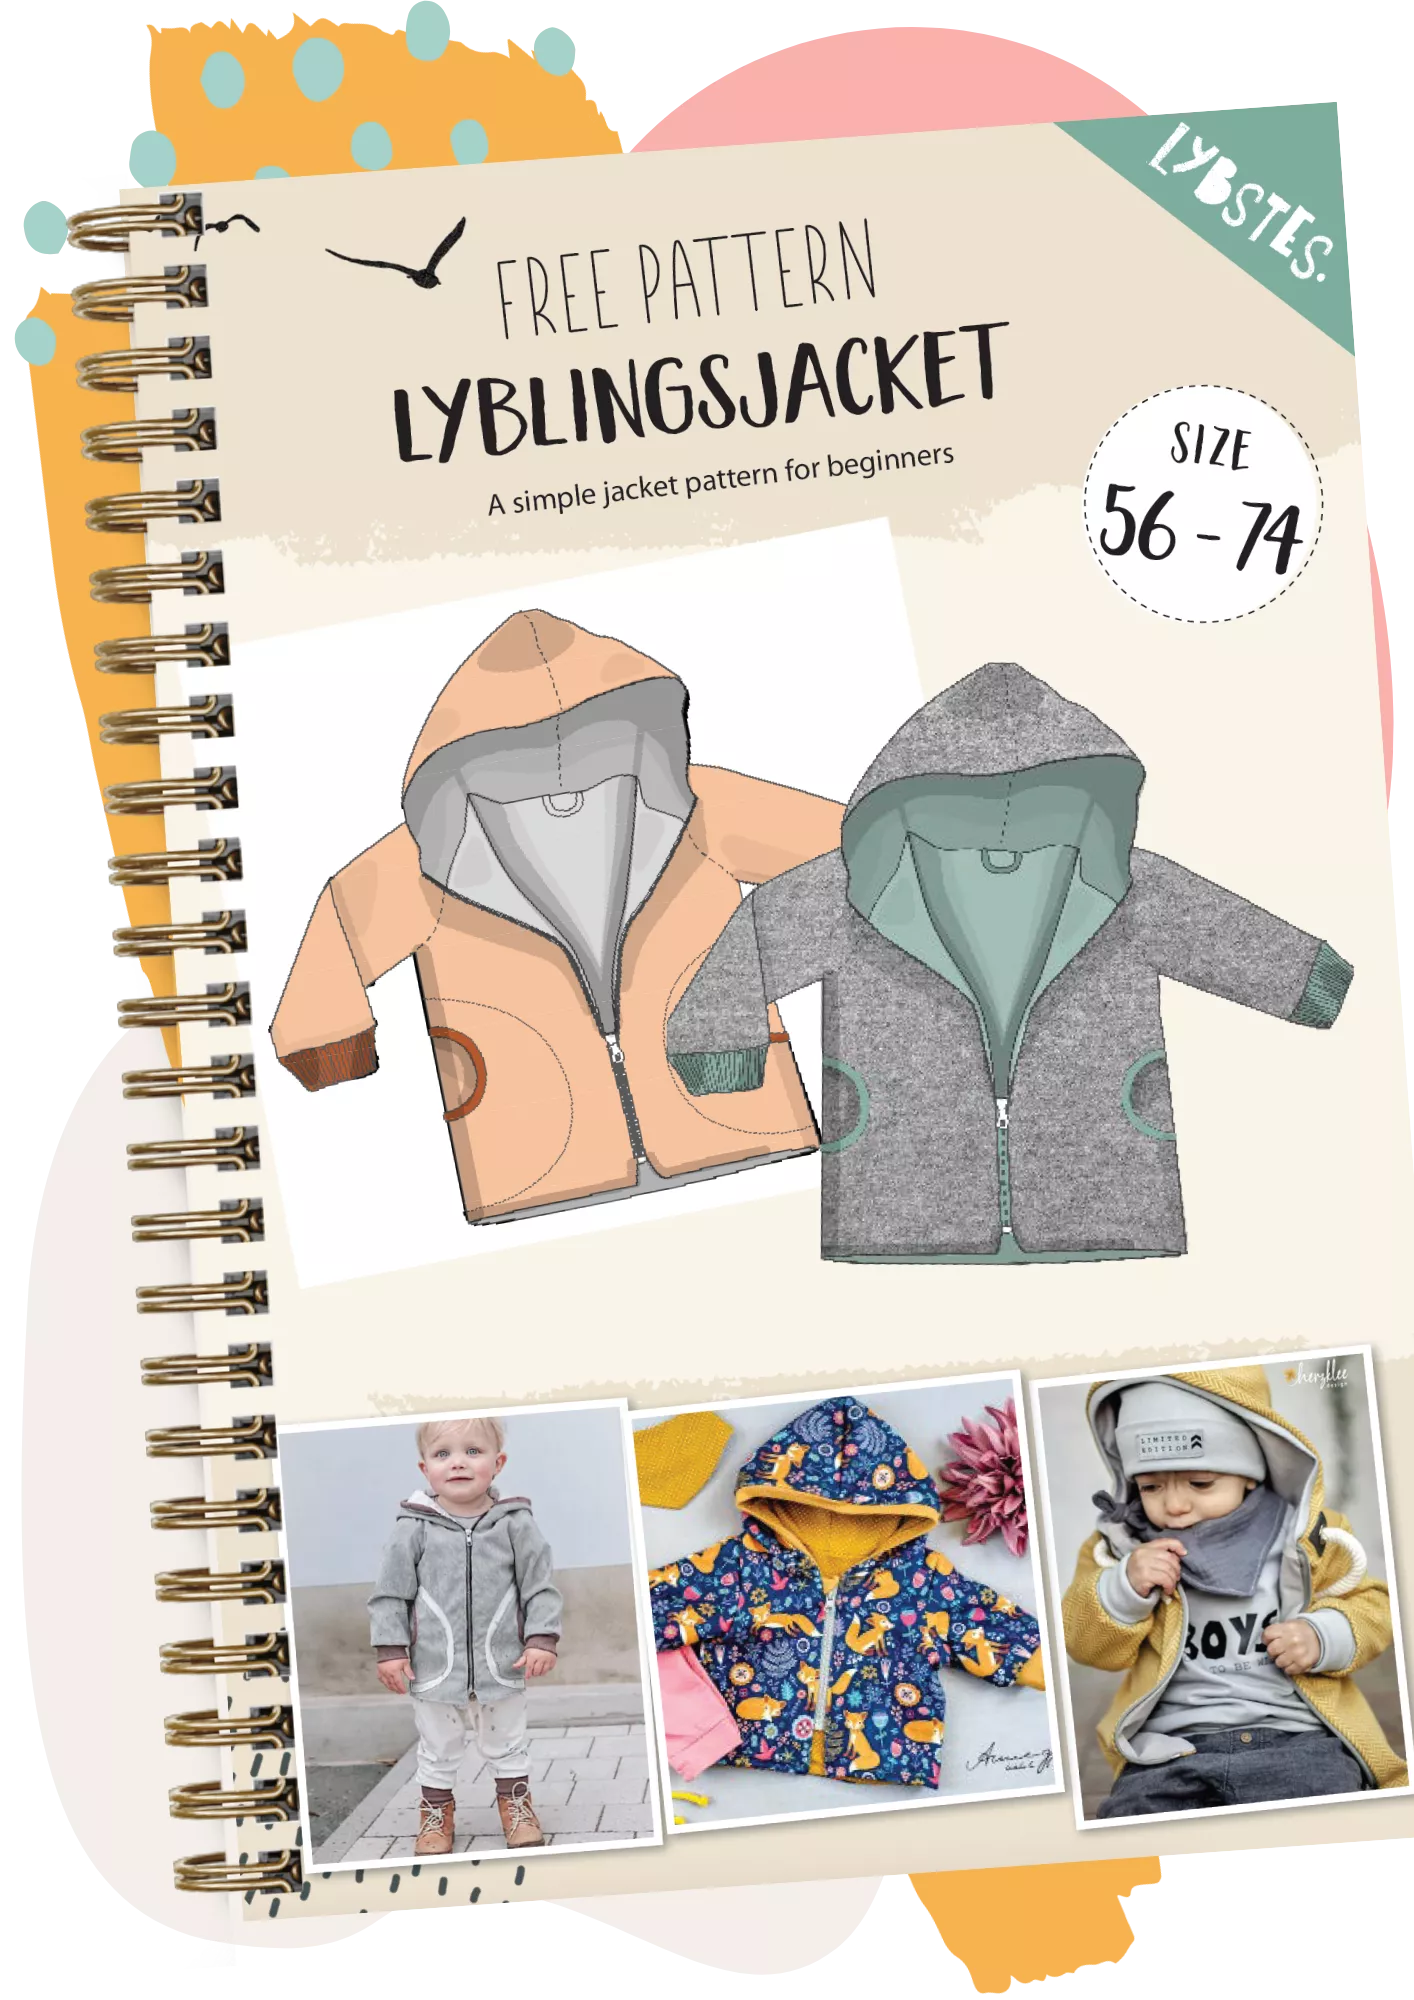
Free Pattern: Lybstes Baby-Jacket
PDF Pattern for Din A4 Print and Instructions
Download the pattern and print it at home! Make sure to print at „Actual Size“. Do not scale! Check the test square to make sure that the pattern is printing at the correct size. The edges and markings on each page help you assemble the pattern in the right way. Match up 1 with 1, 2 with 2, etc.
DownloadStep by step ...
Do you want to have buttons? No problem!
Lining a jacket is easier than you think.... dare to do it! You'll be rewarded with a jacket that looks just perfect on the outside and inside, without any annoying seams, and that keeps you doubly cozy and warm thanks to the double layer.
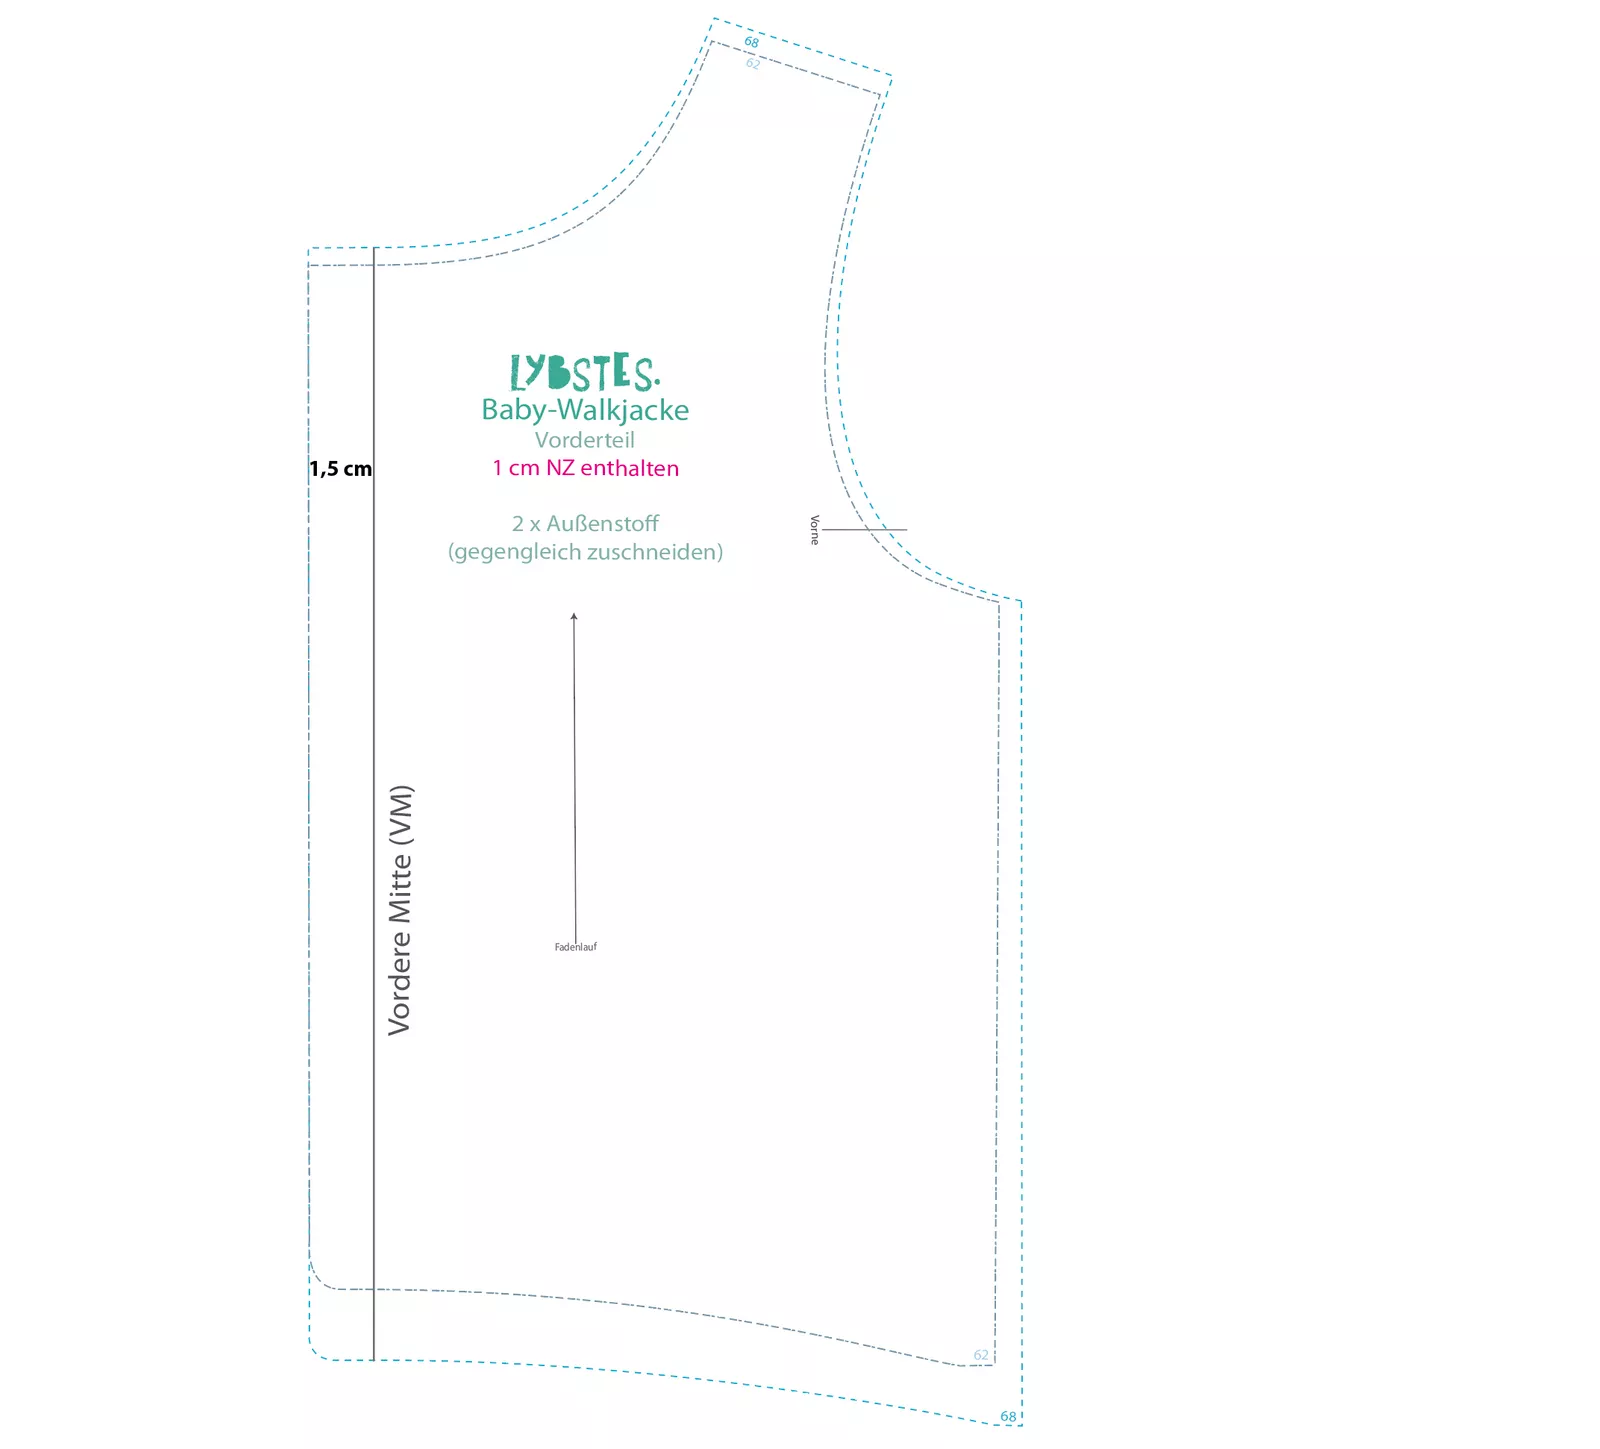
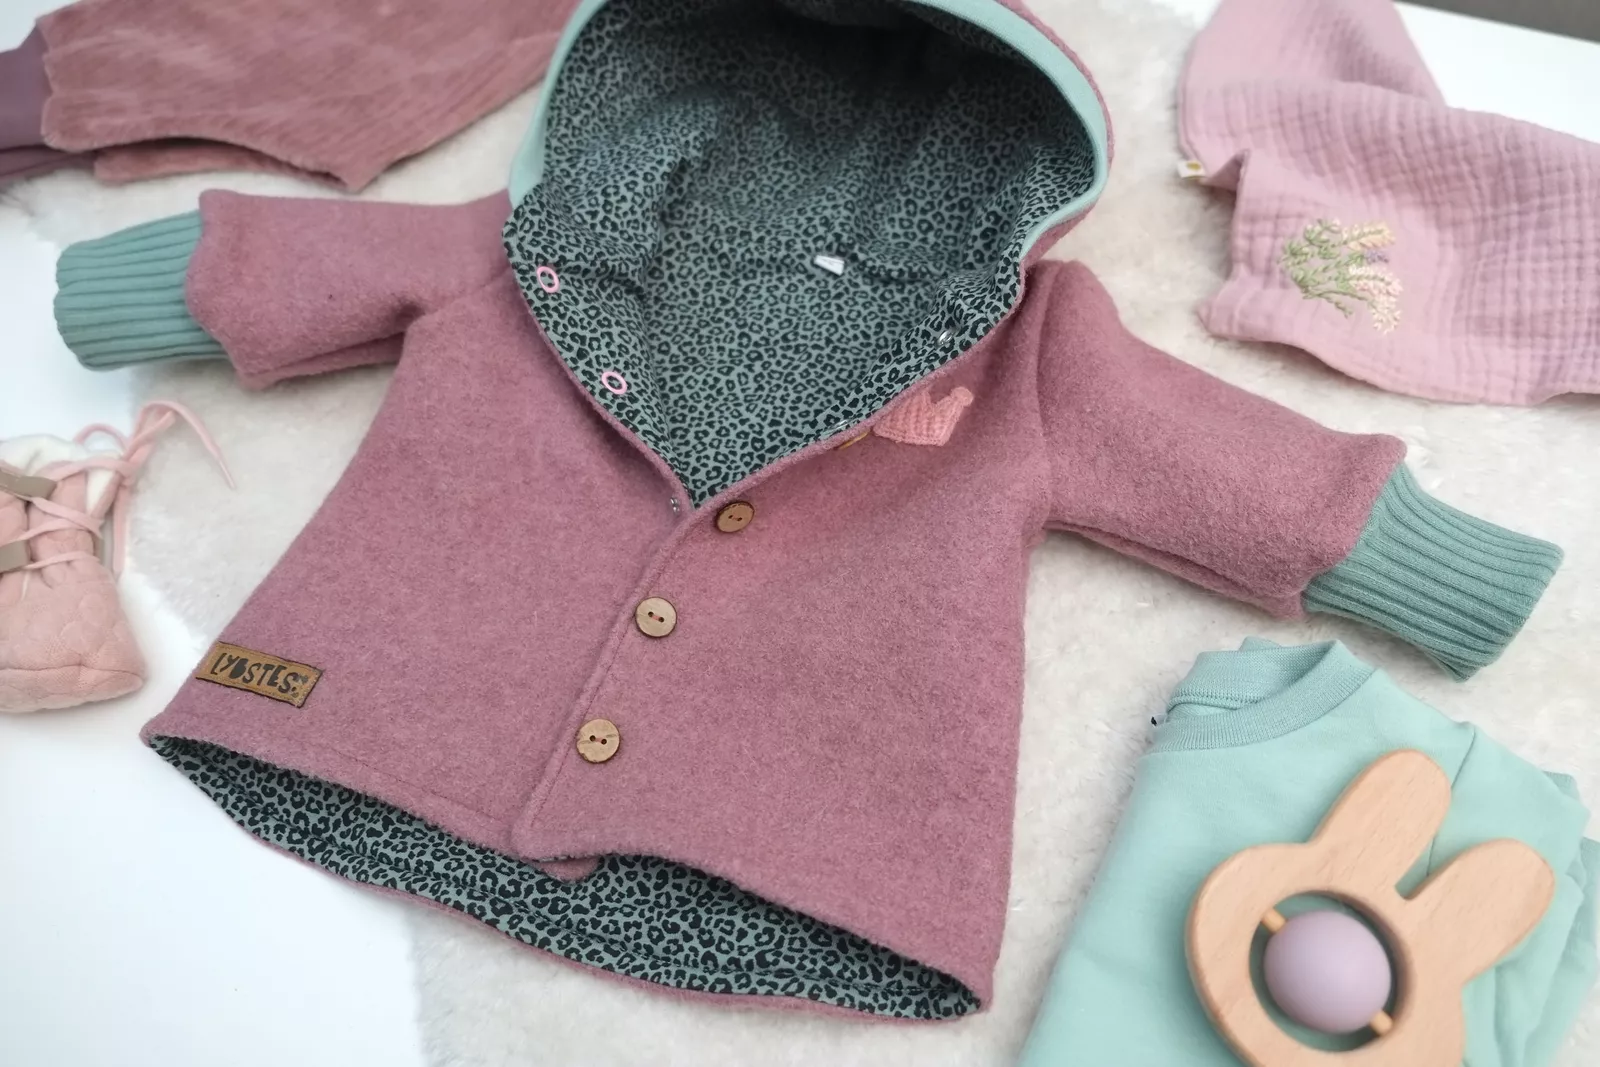
Actually the jacket is for zippers. But when you put 1,5 cm/0,6 inch to the fold, it is suitable for buttons as well.
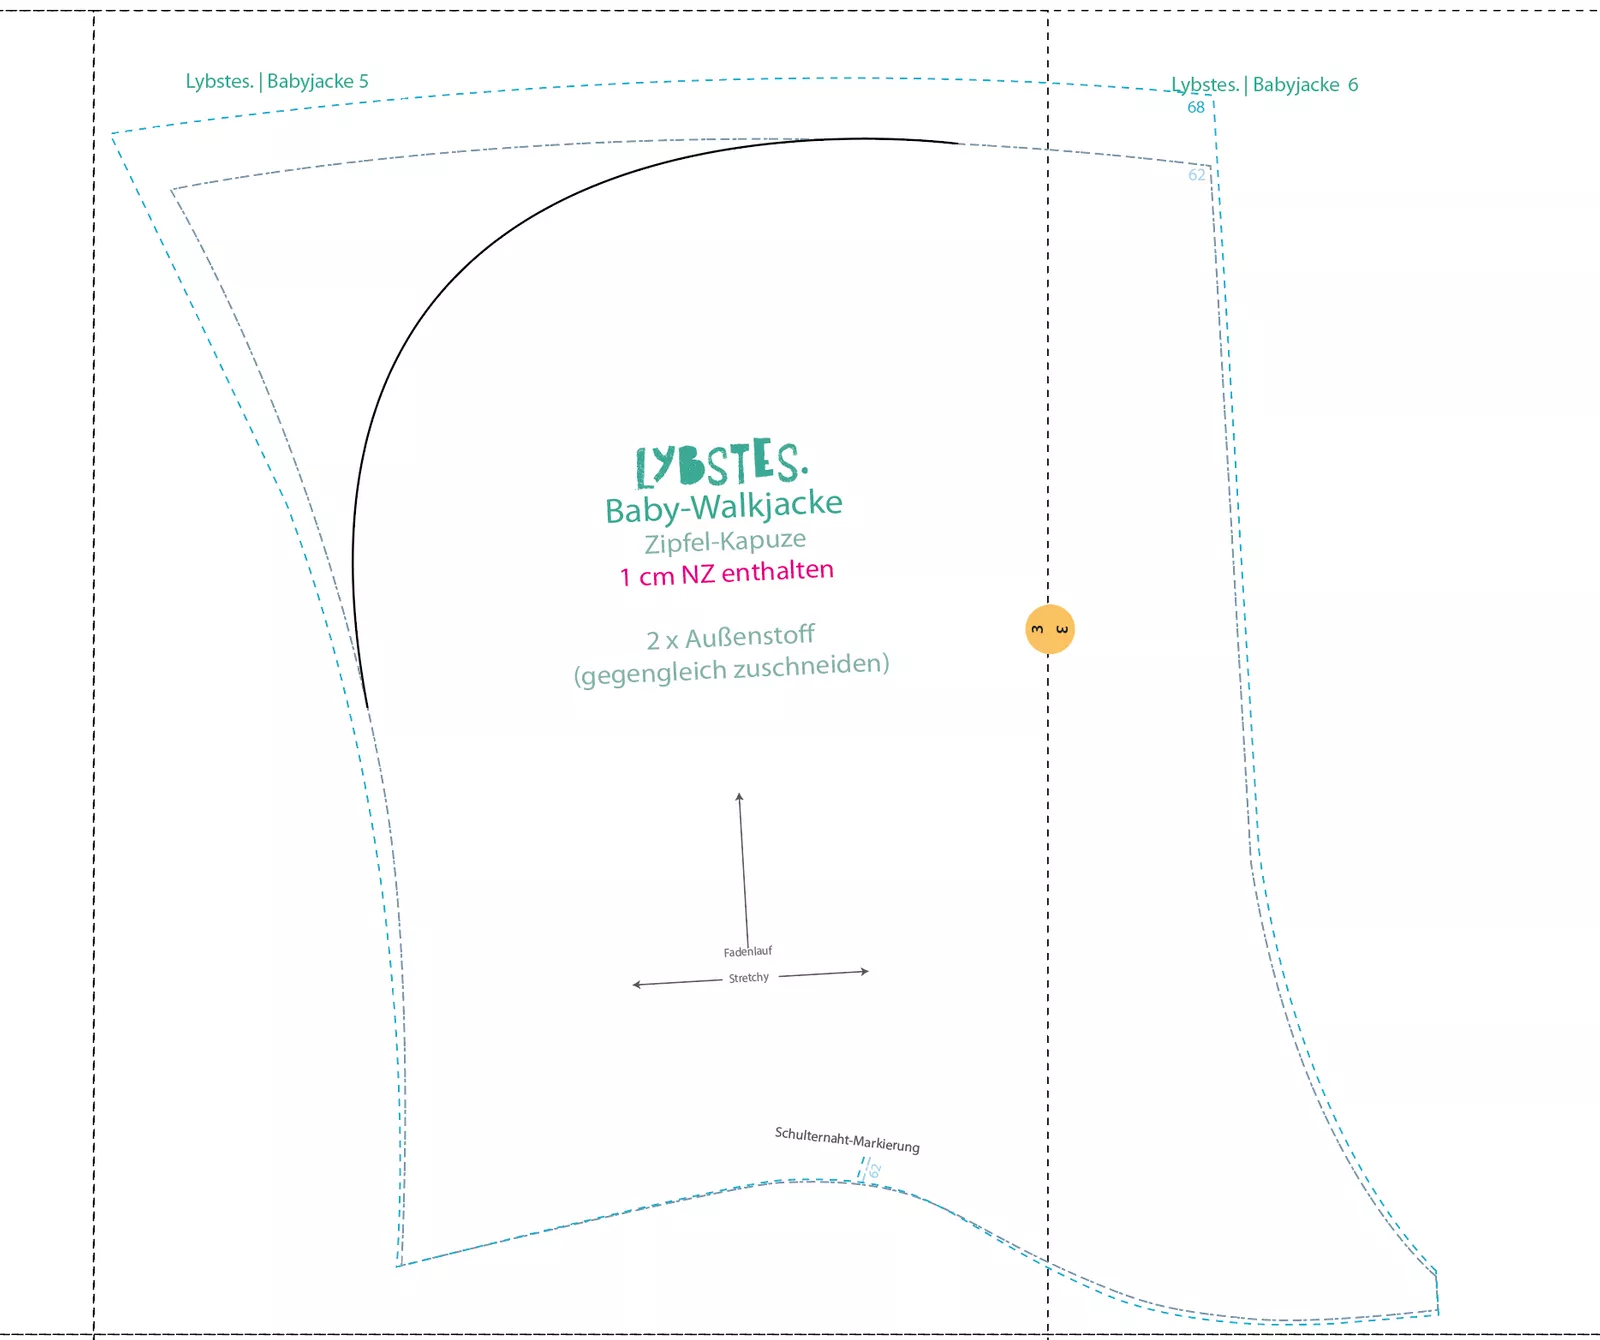
And you can also make a pointed hood (dwarves hood?), when you change the rounded hood a little bit to a pointed one. It's easy, just try it out.
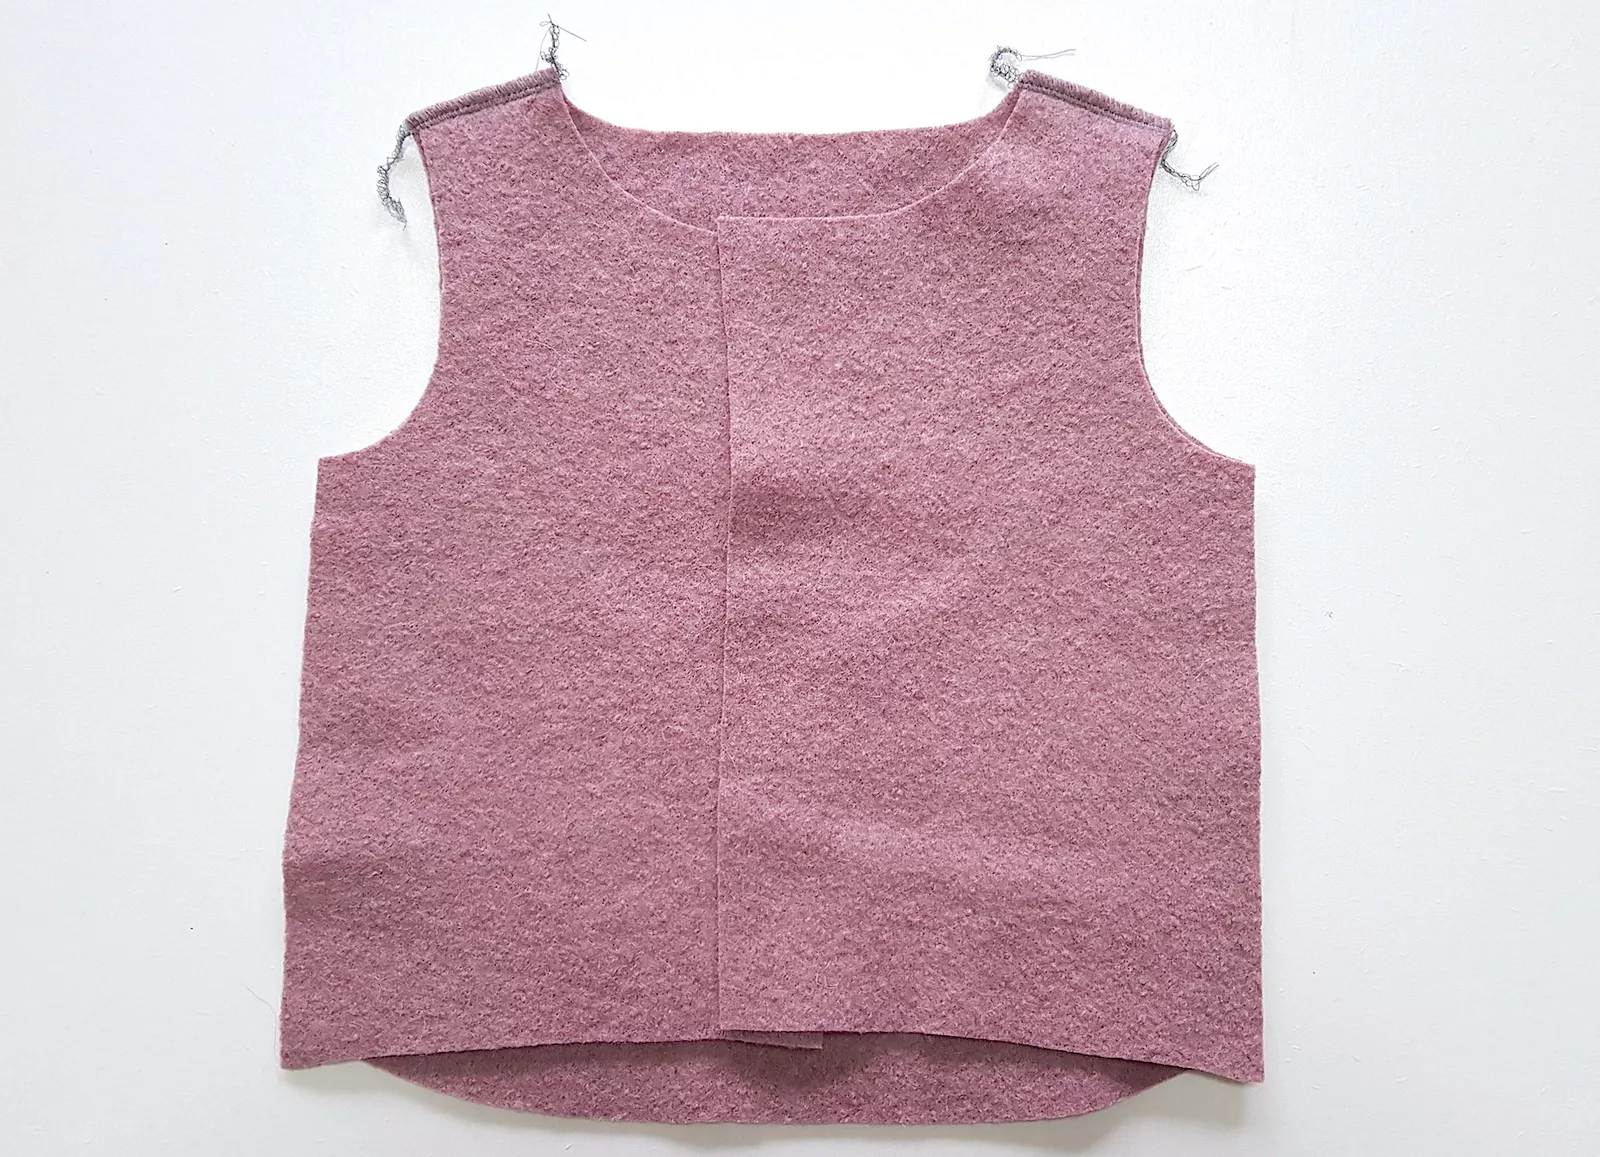
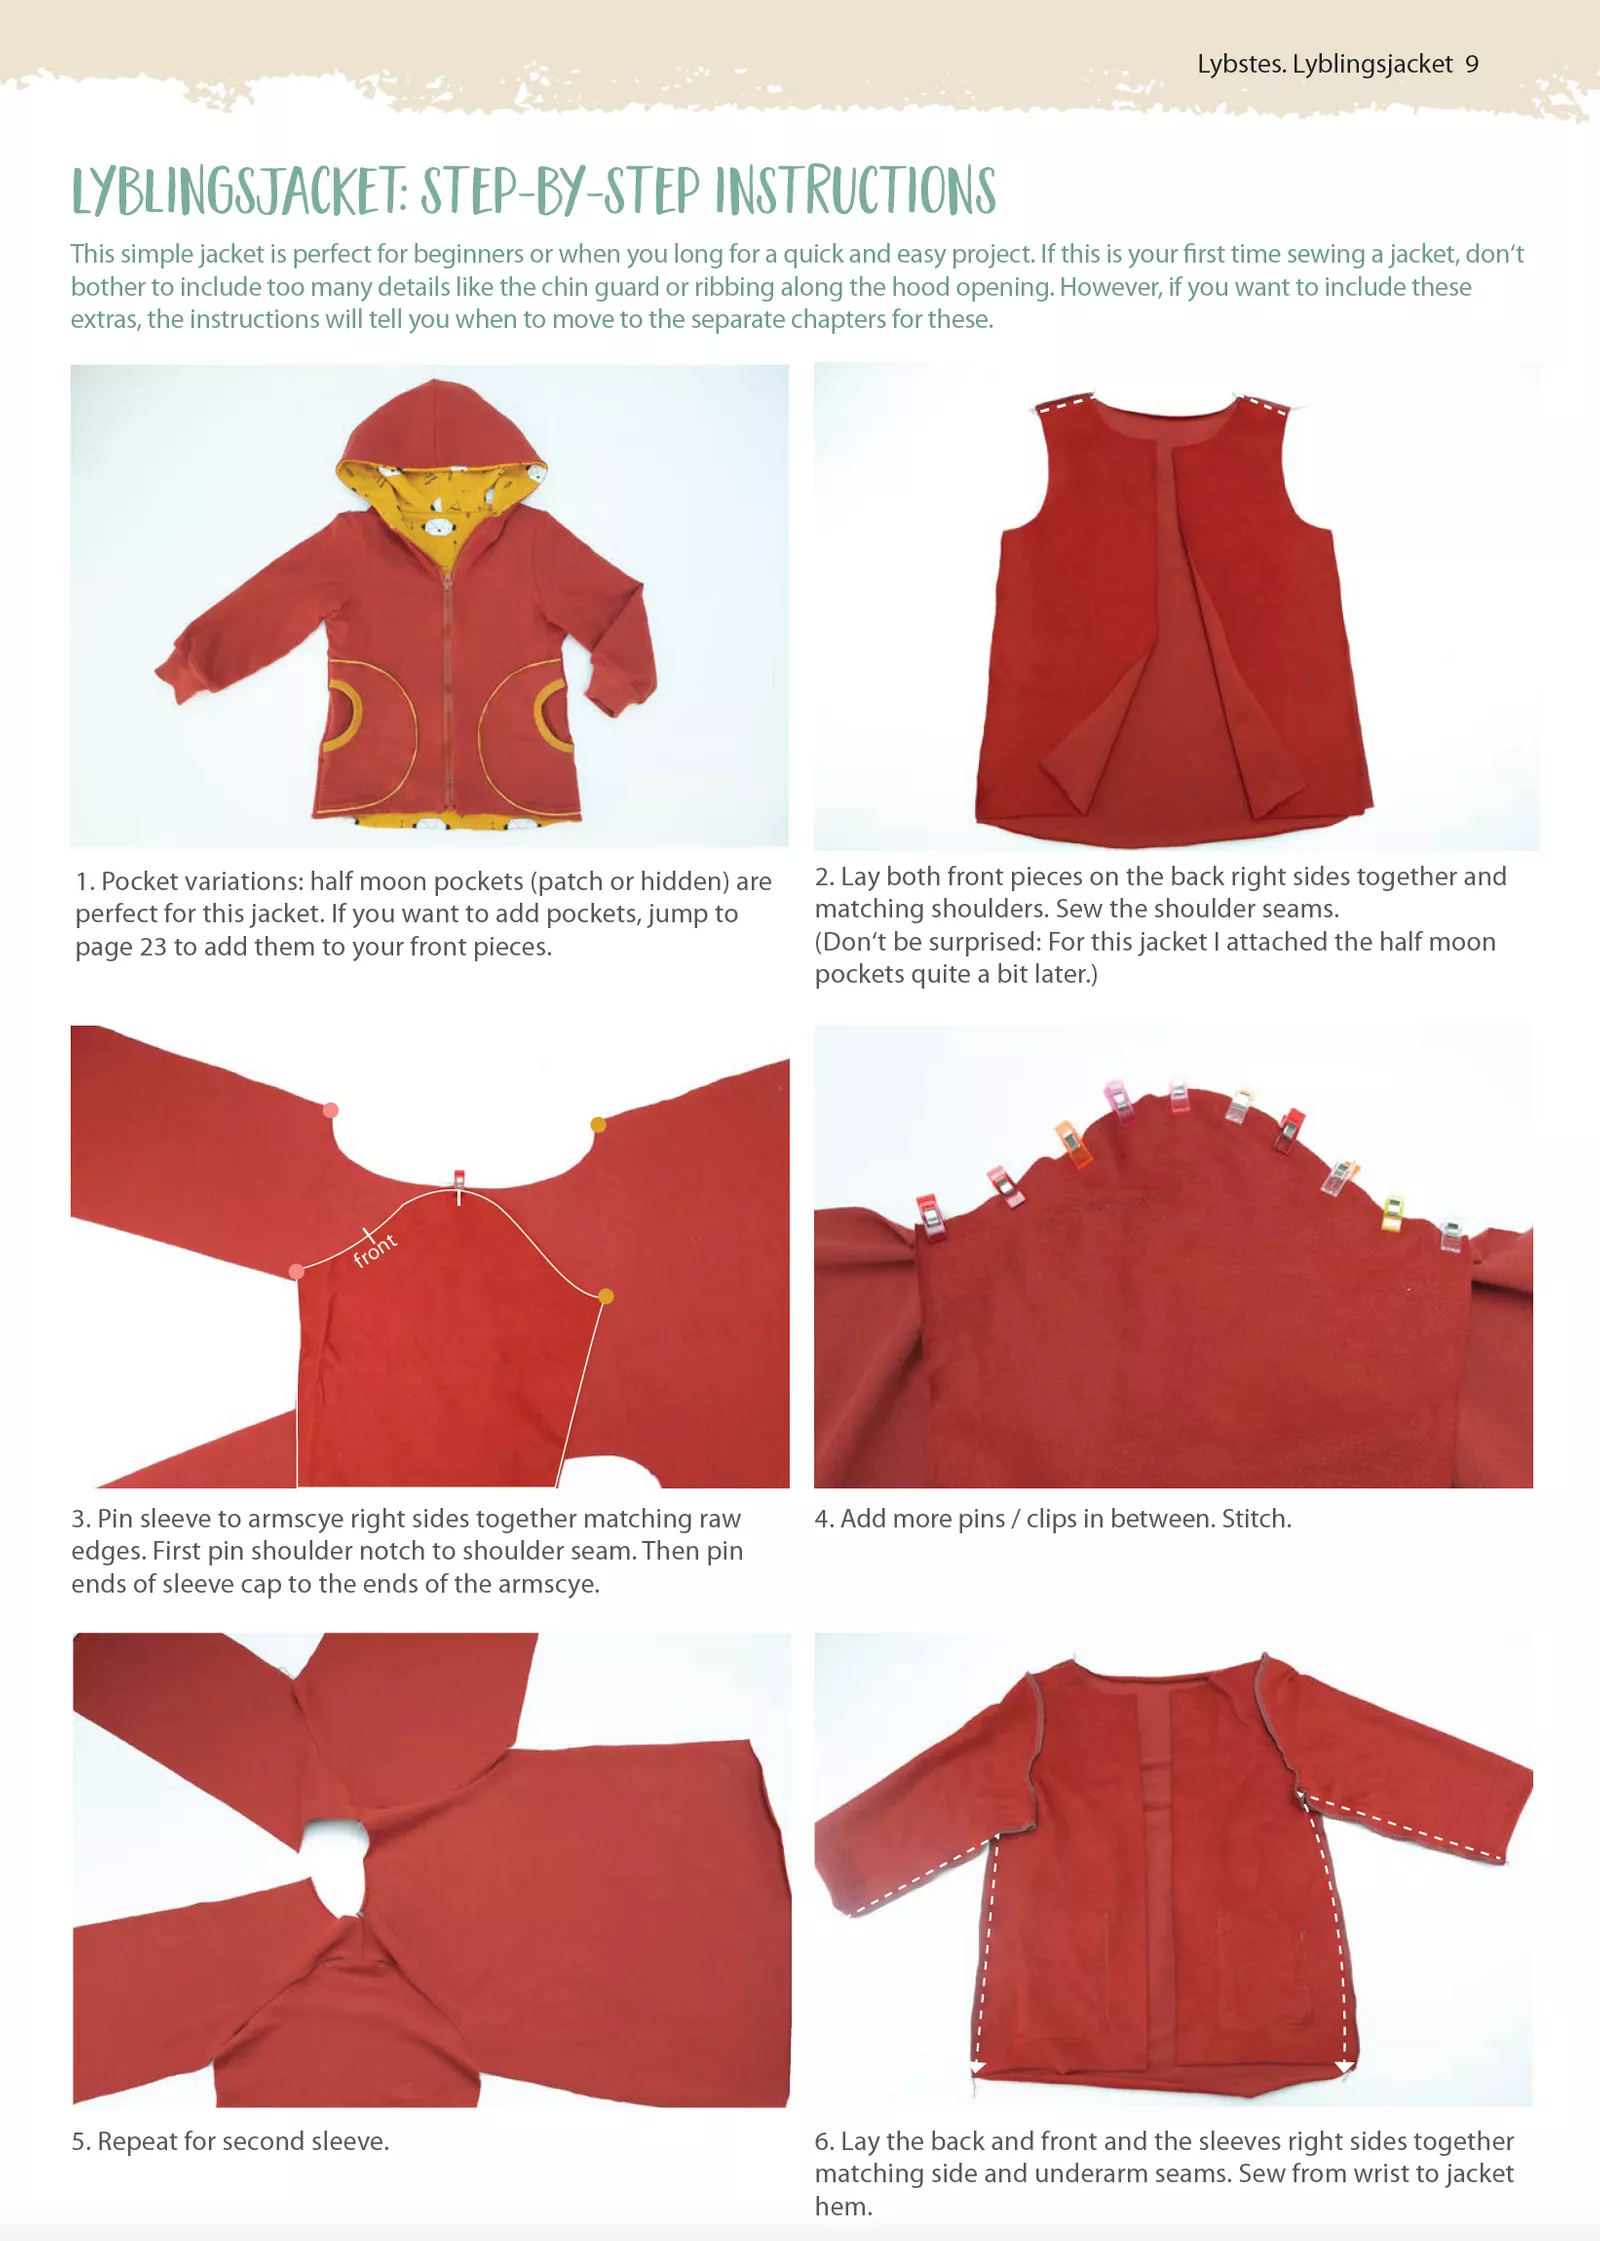
Step 1: Lay both front pieces on the back right sides together and matching shoulders. Sew the shoulder seams.
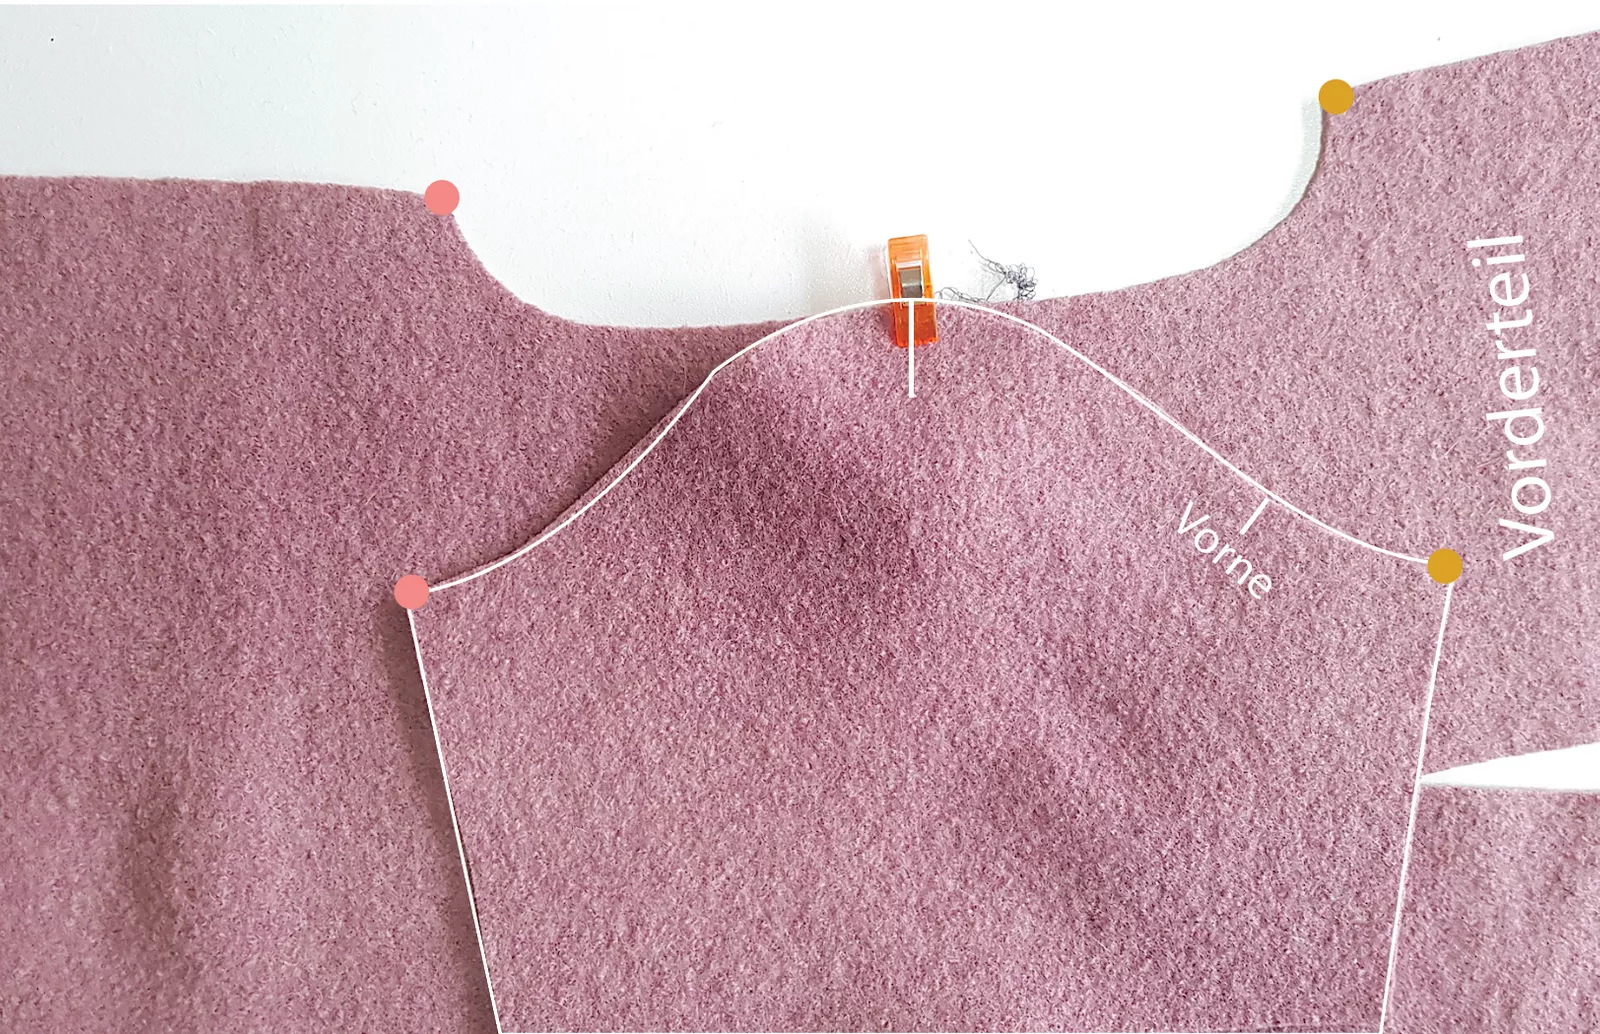
Step 2: Pin sleeve to armscye right sides together matching raw edges. First pin shoulder notch to shoulder seam. Then pin ends of sleeve cap to the ends of the armscye.
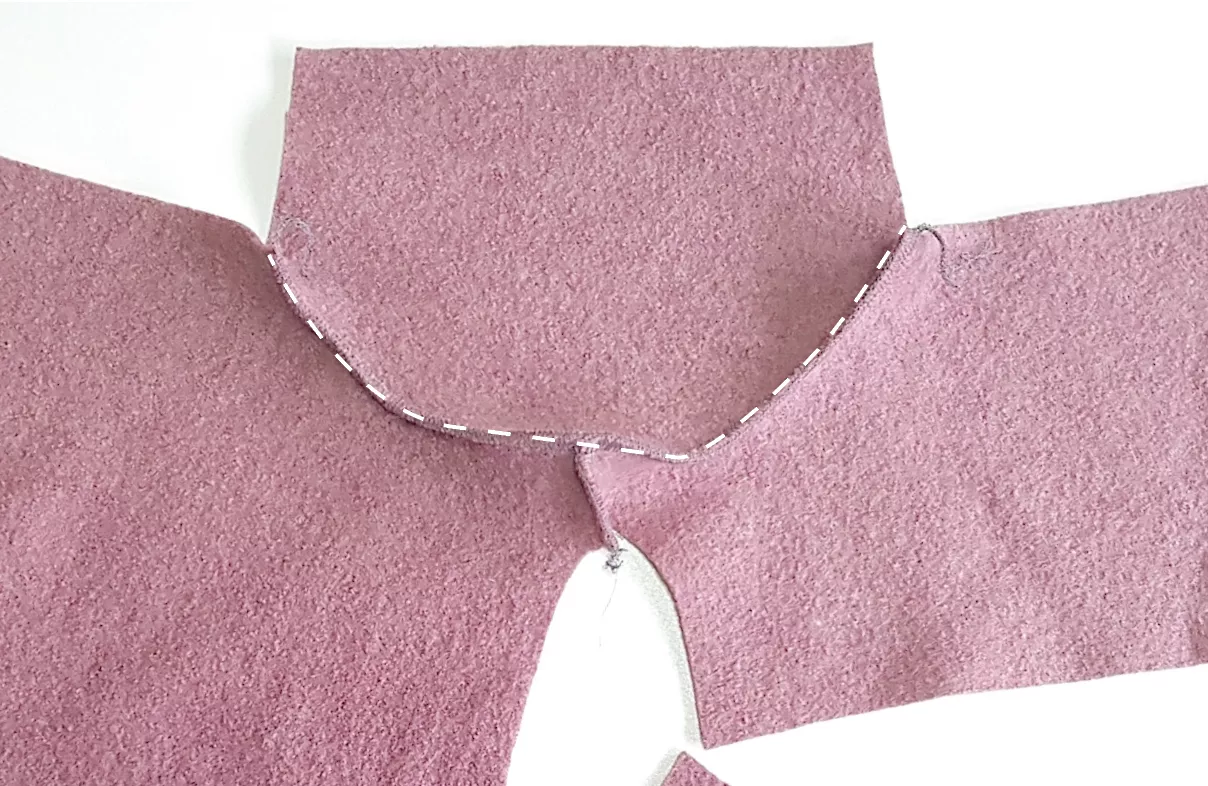
Step 3: Add more pins / clips in between. Stitch.
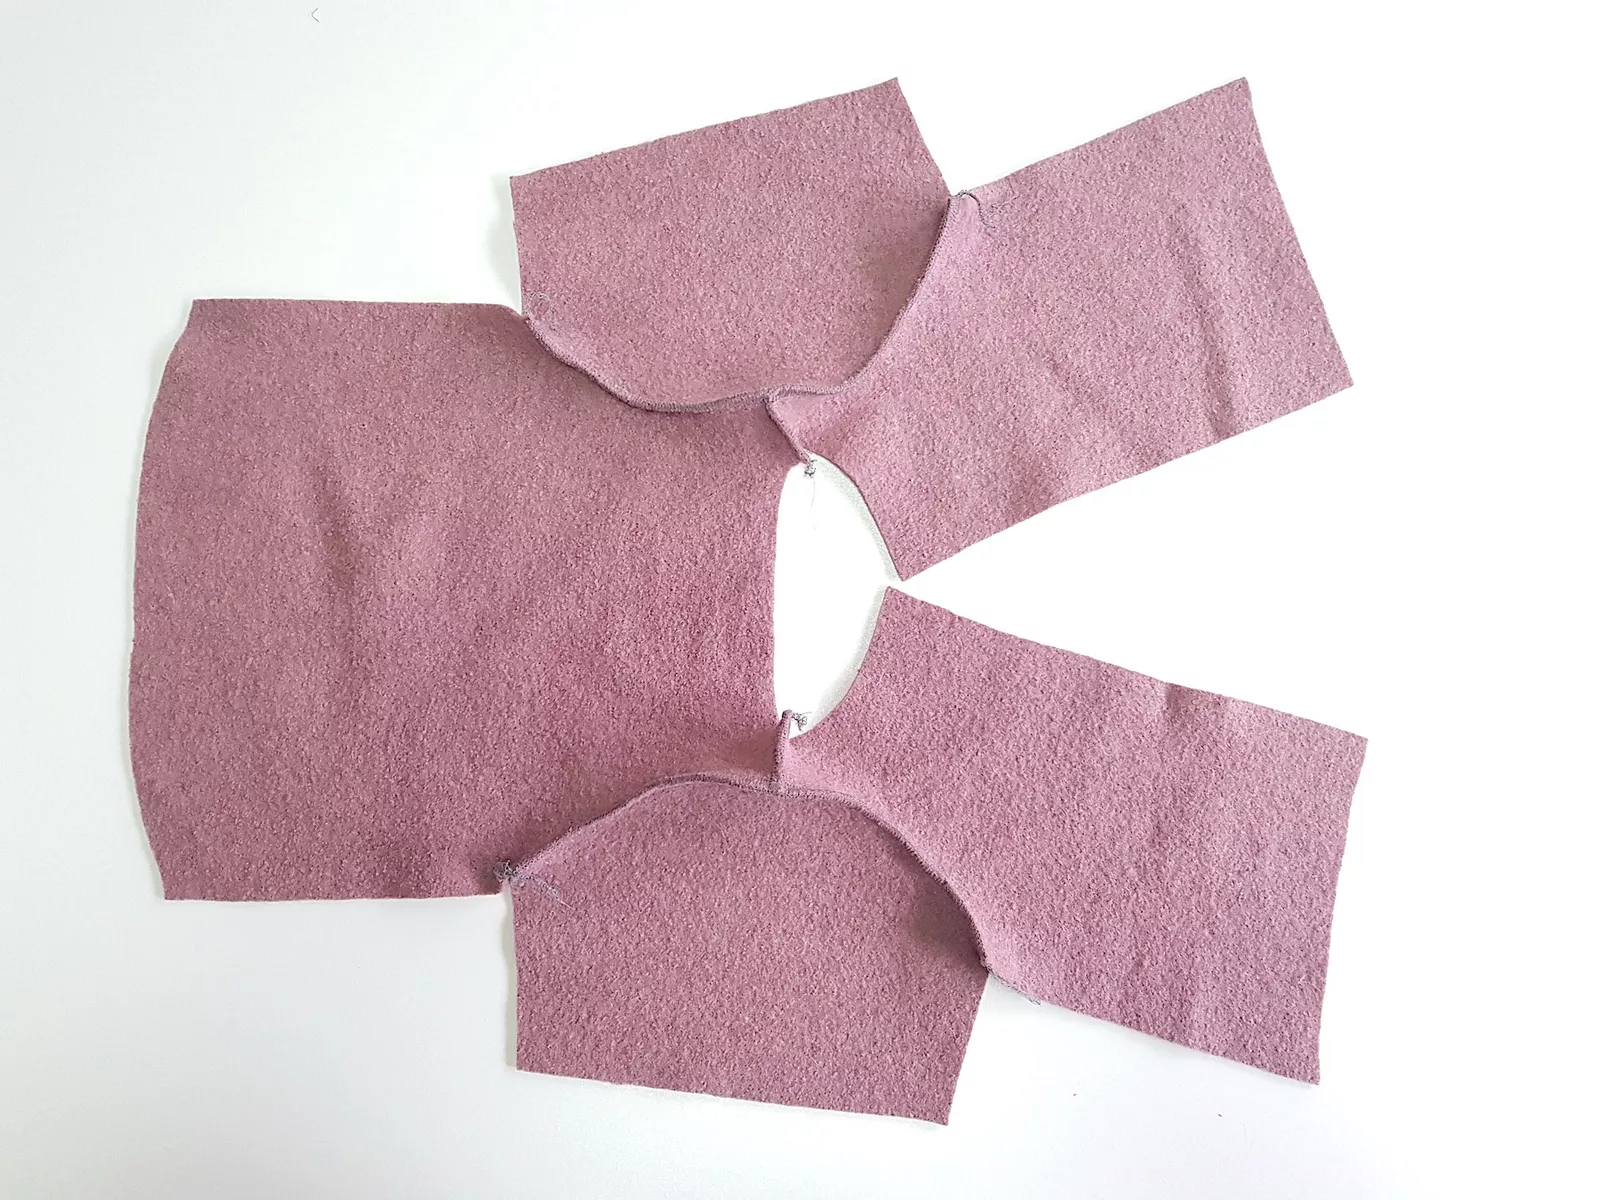
Step 4: Repeat for second sleeve.
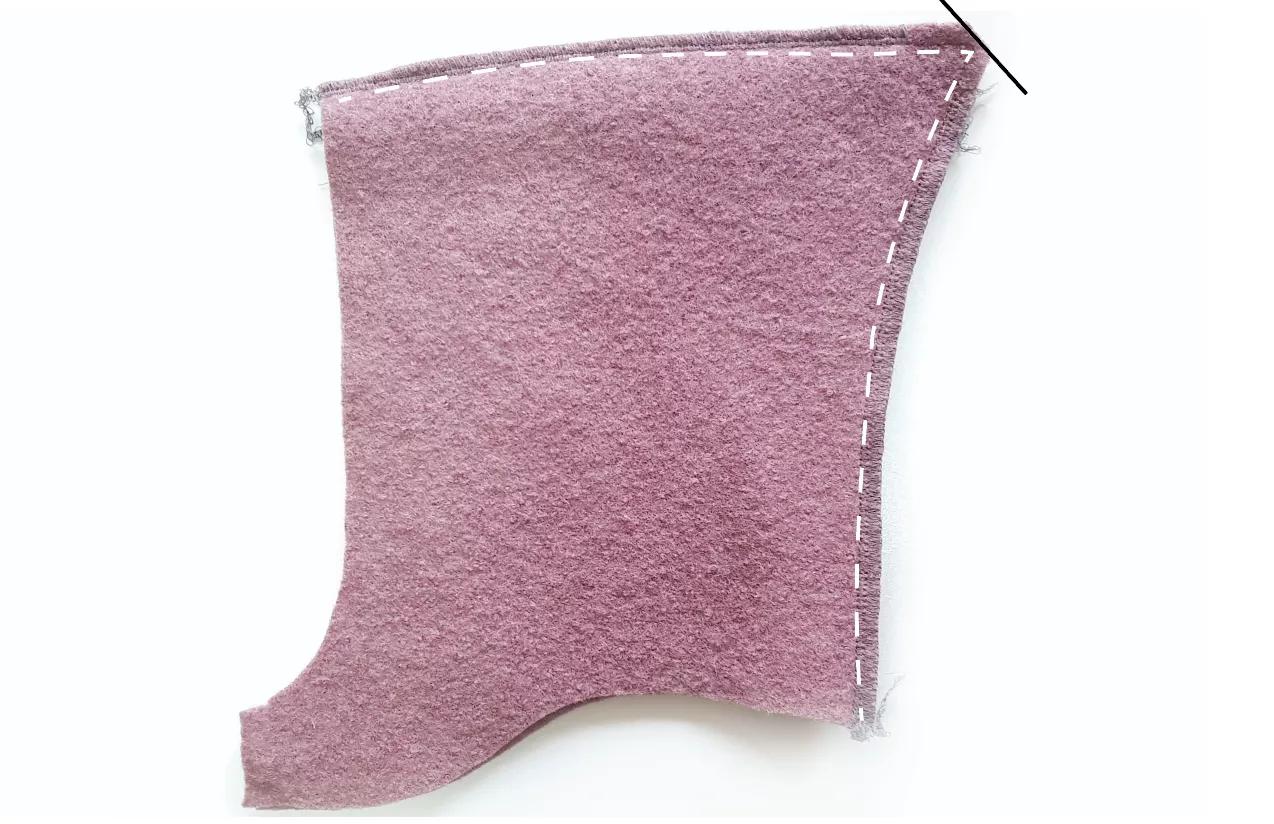
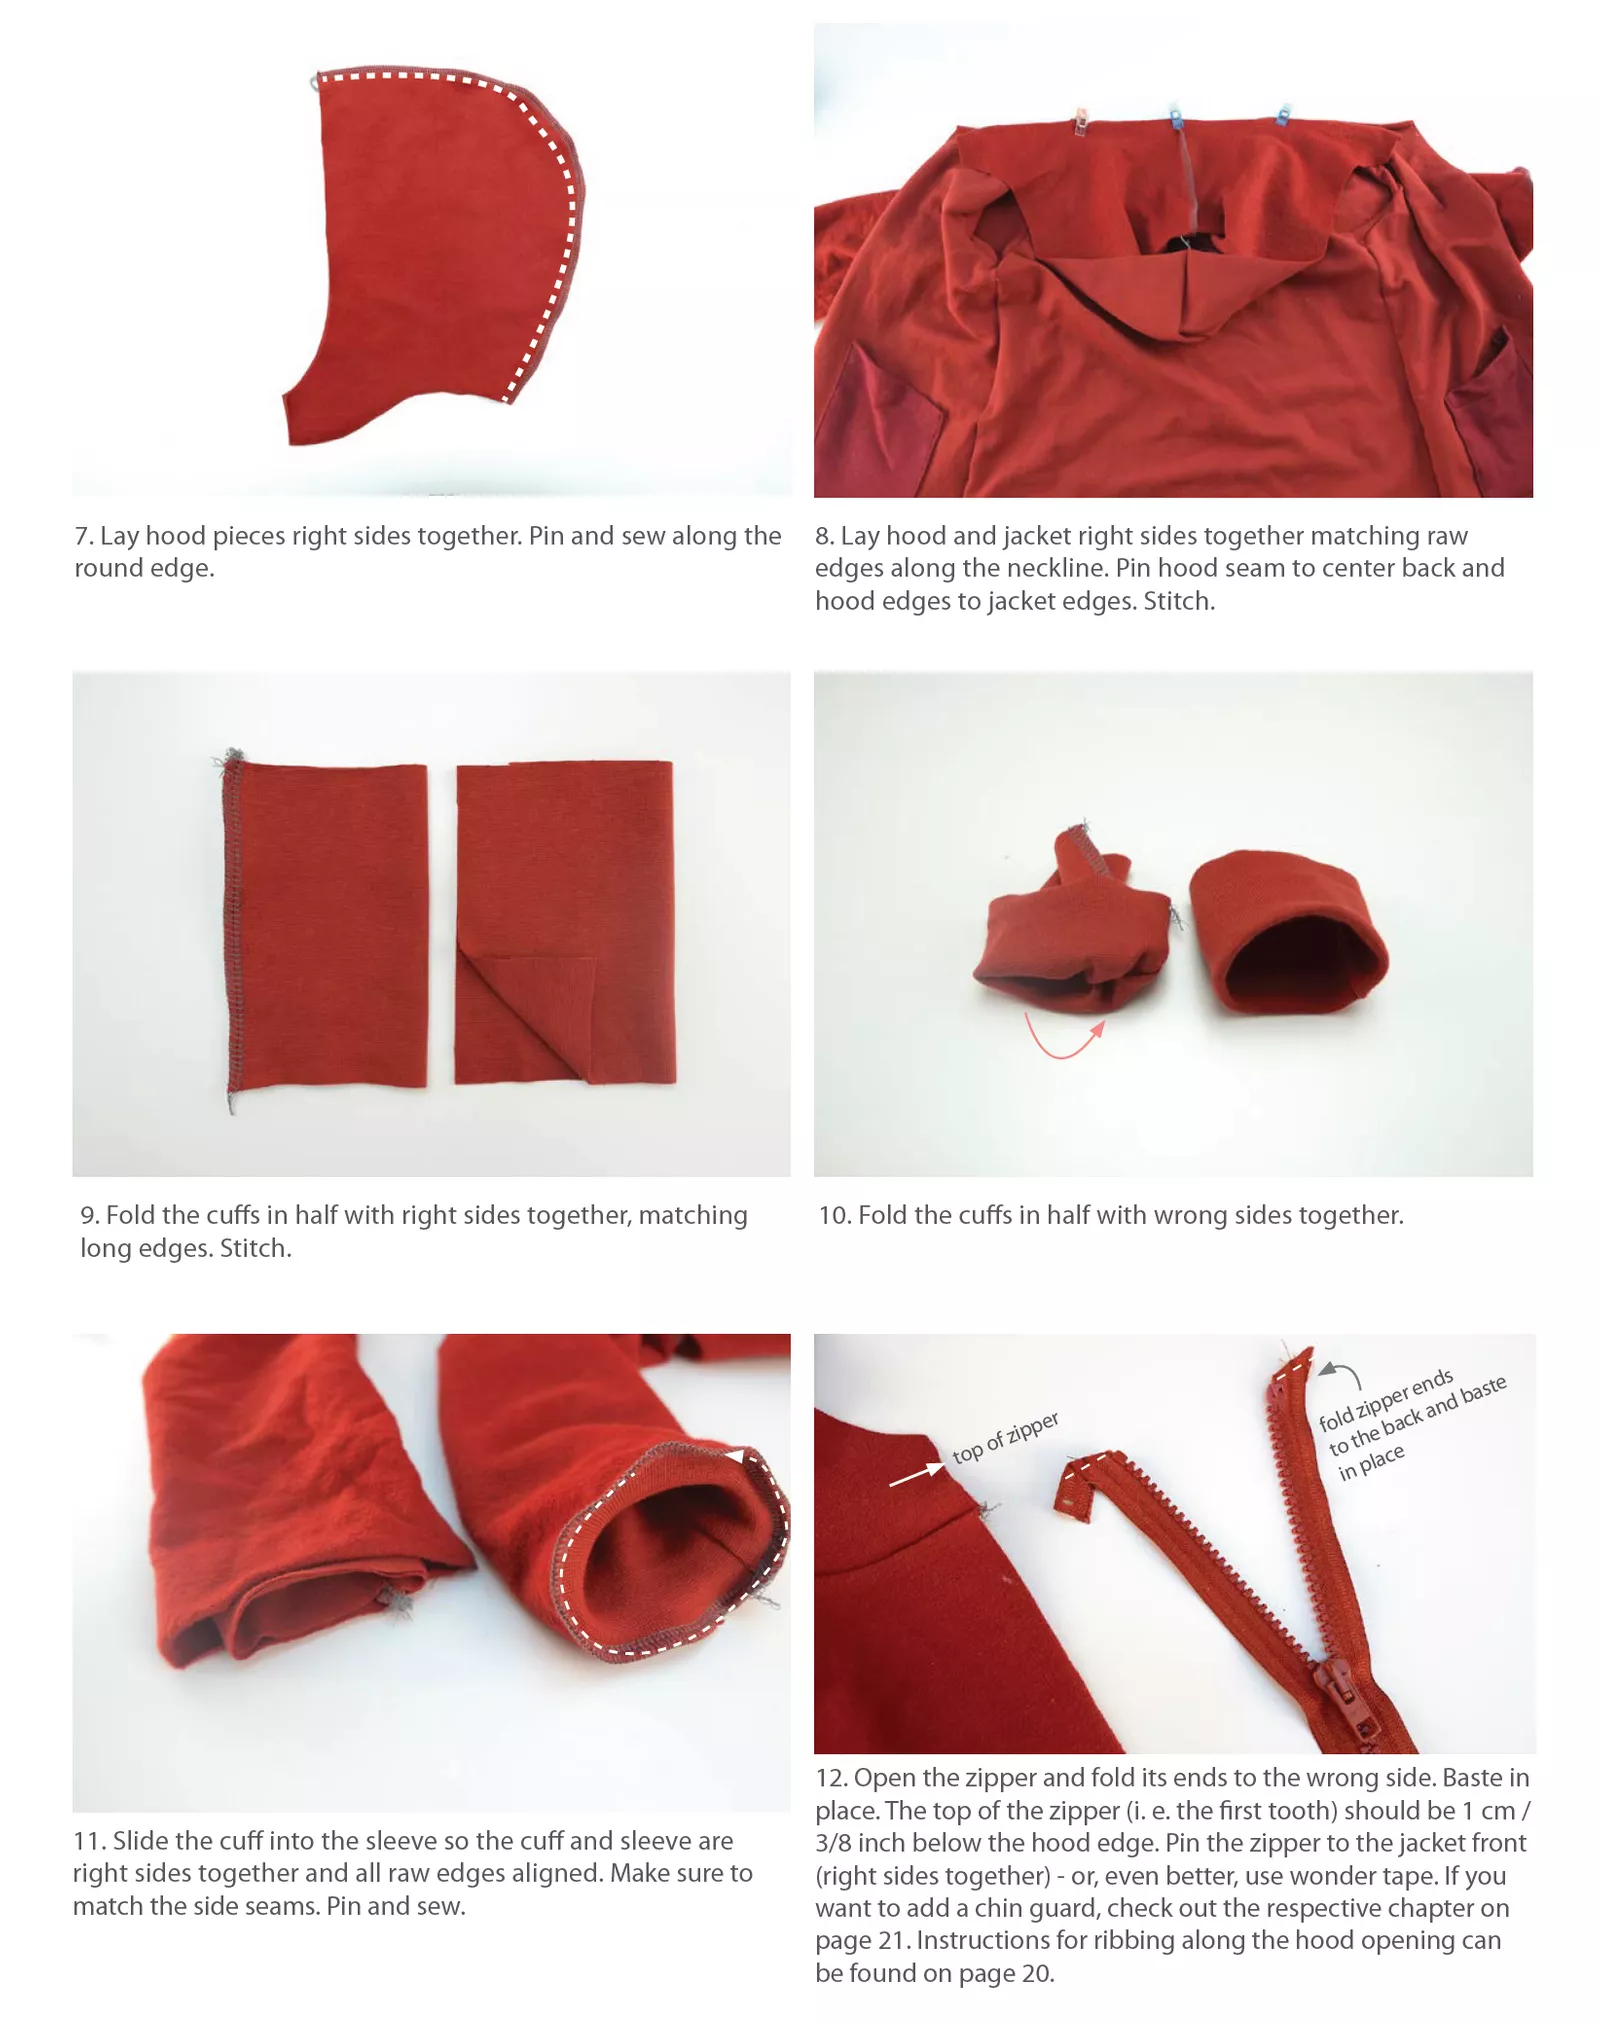
Step 5: Lay hood pieces right sides together. Pin and sew along the round edge.
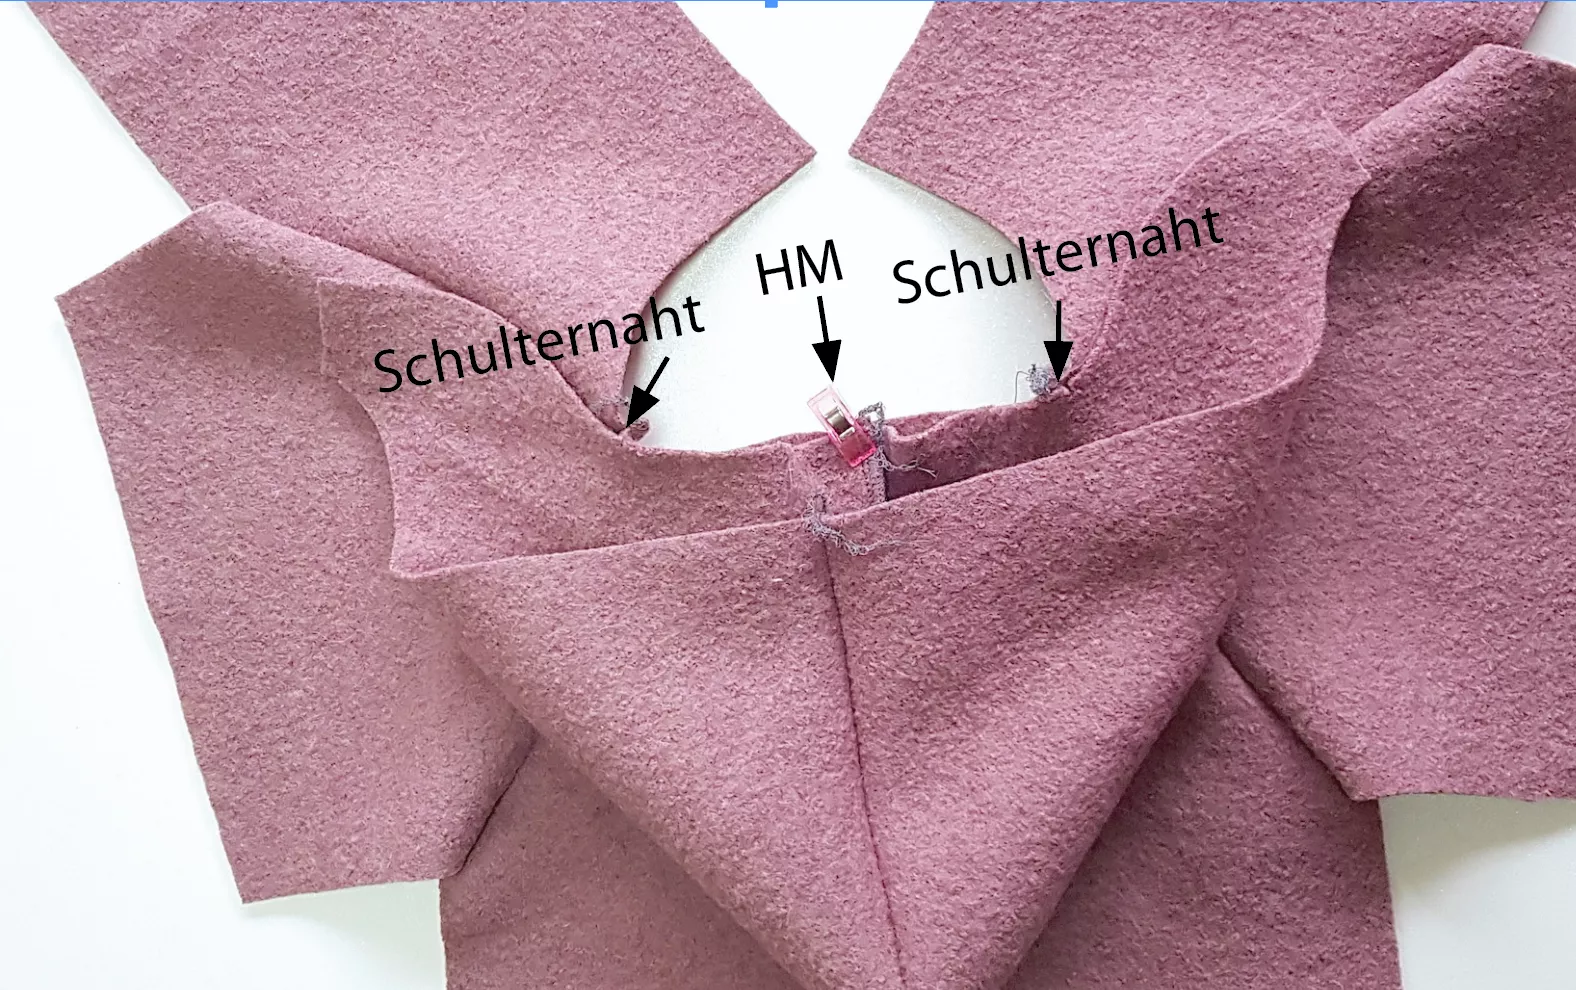
Step 6: Lay hood and jacket right sides together matching raw edges along the neckline. Pin hood seam to center back and hood edges to jacket edges. Stitch.
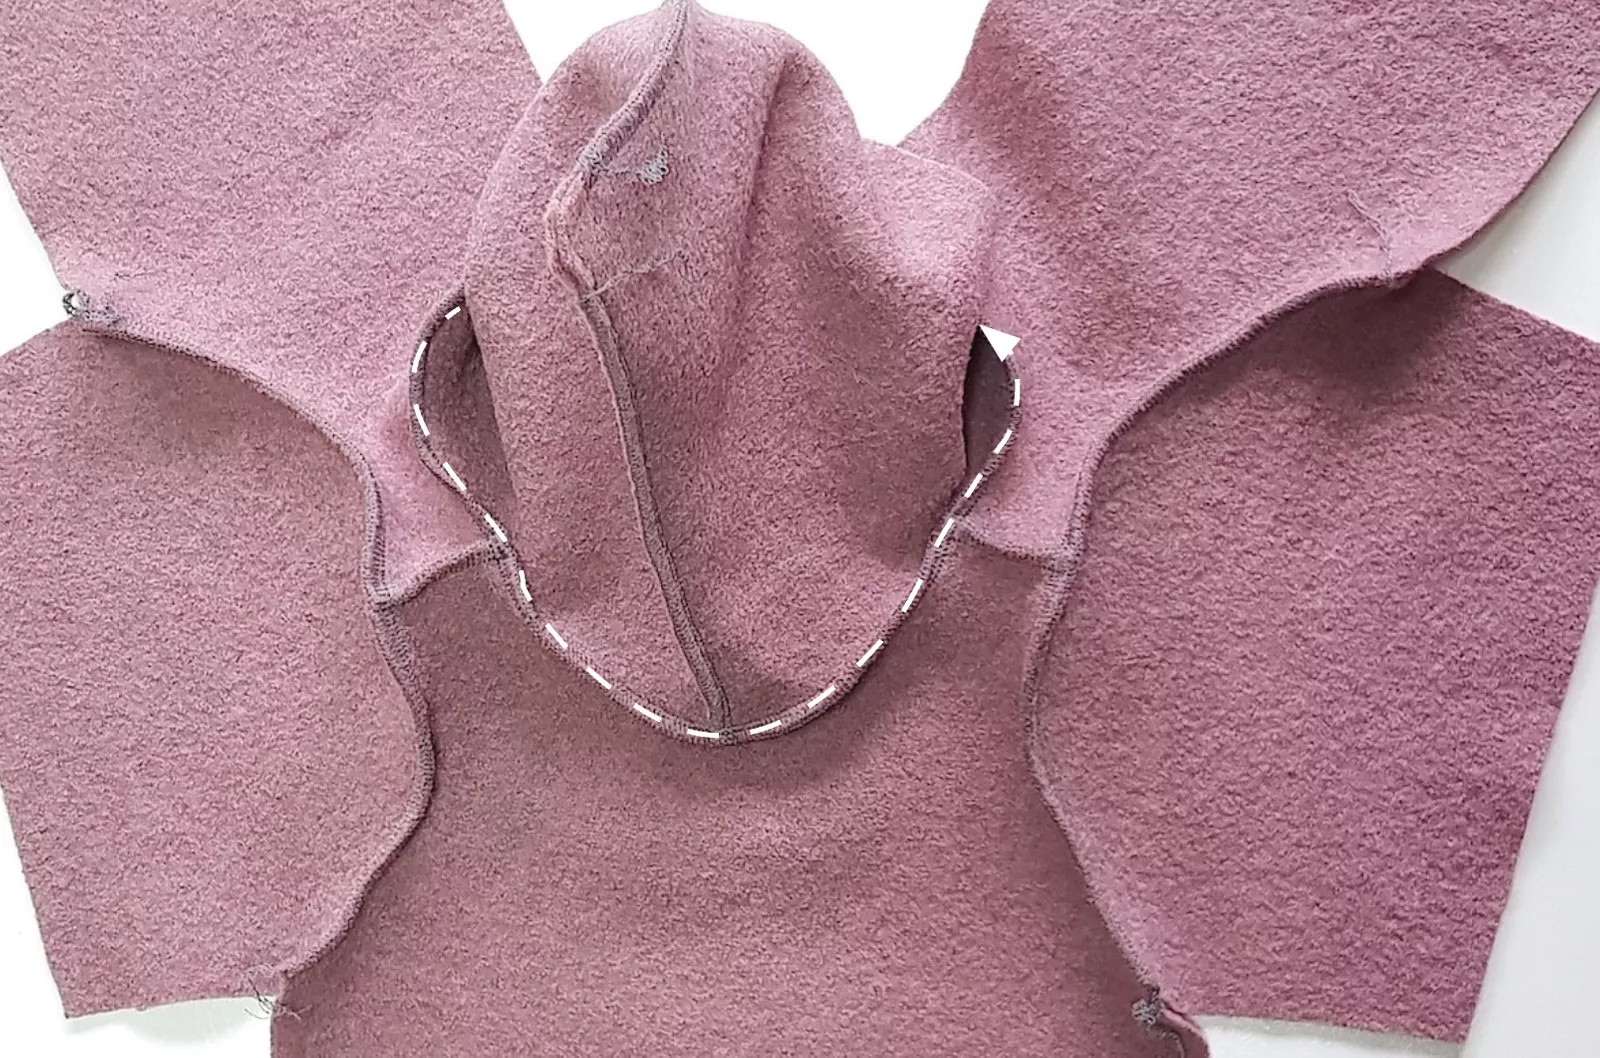
Step 7: Pin the hood to the centre front and then sew it on.
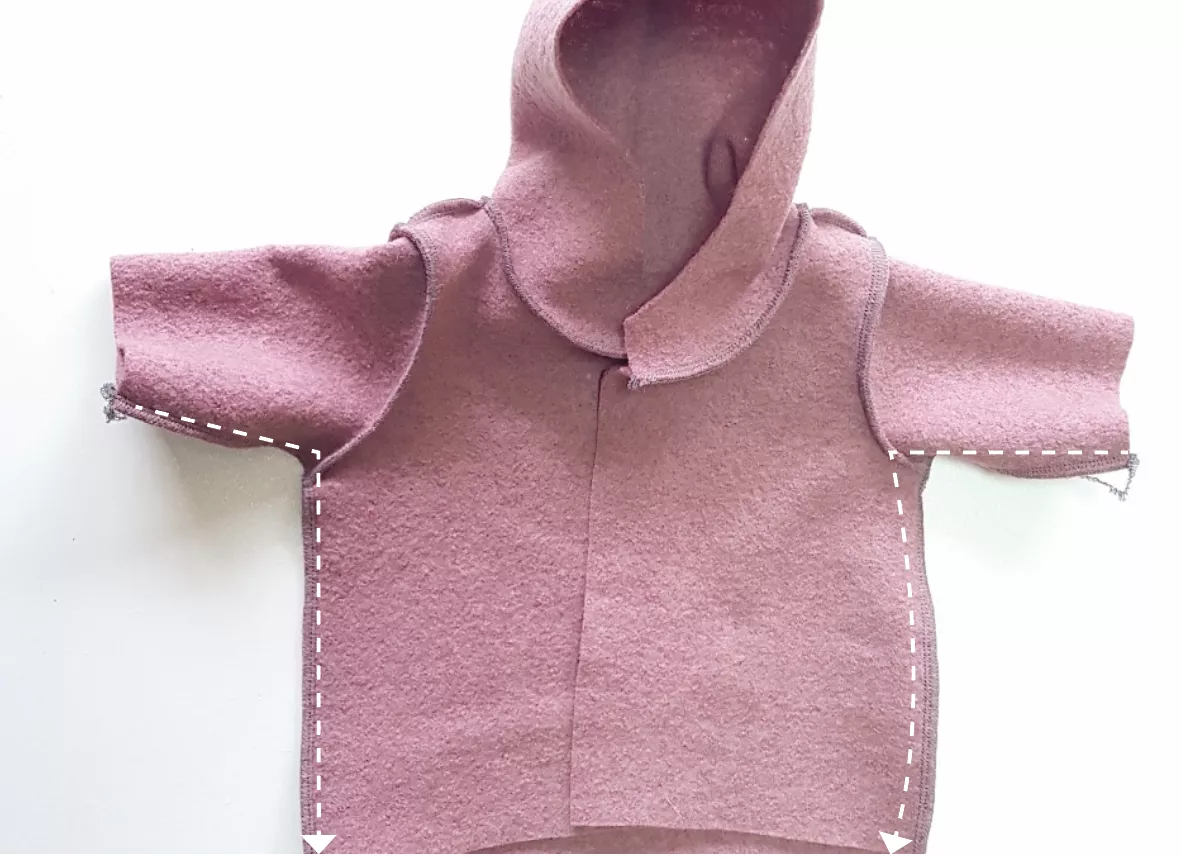
Step 8: Place the back and front right sides together and close the sleeve and side seams in one go.
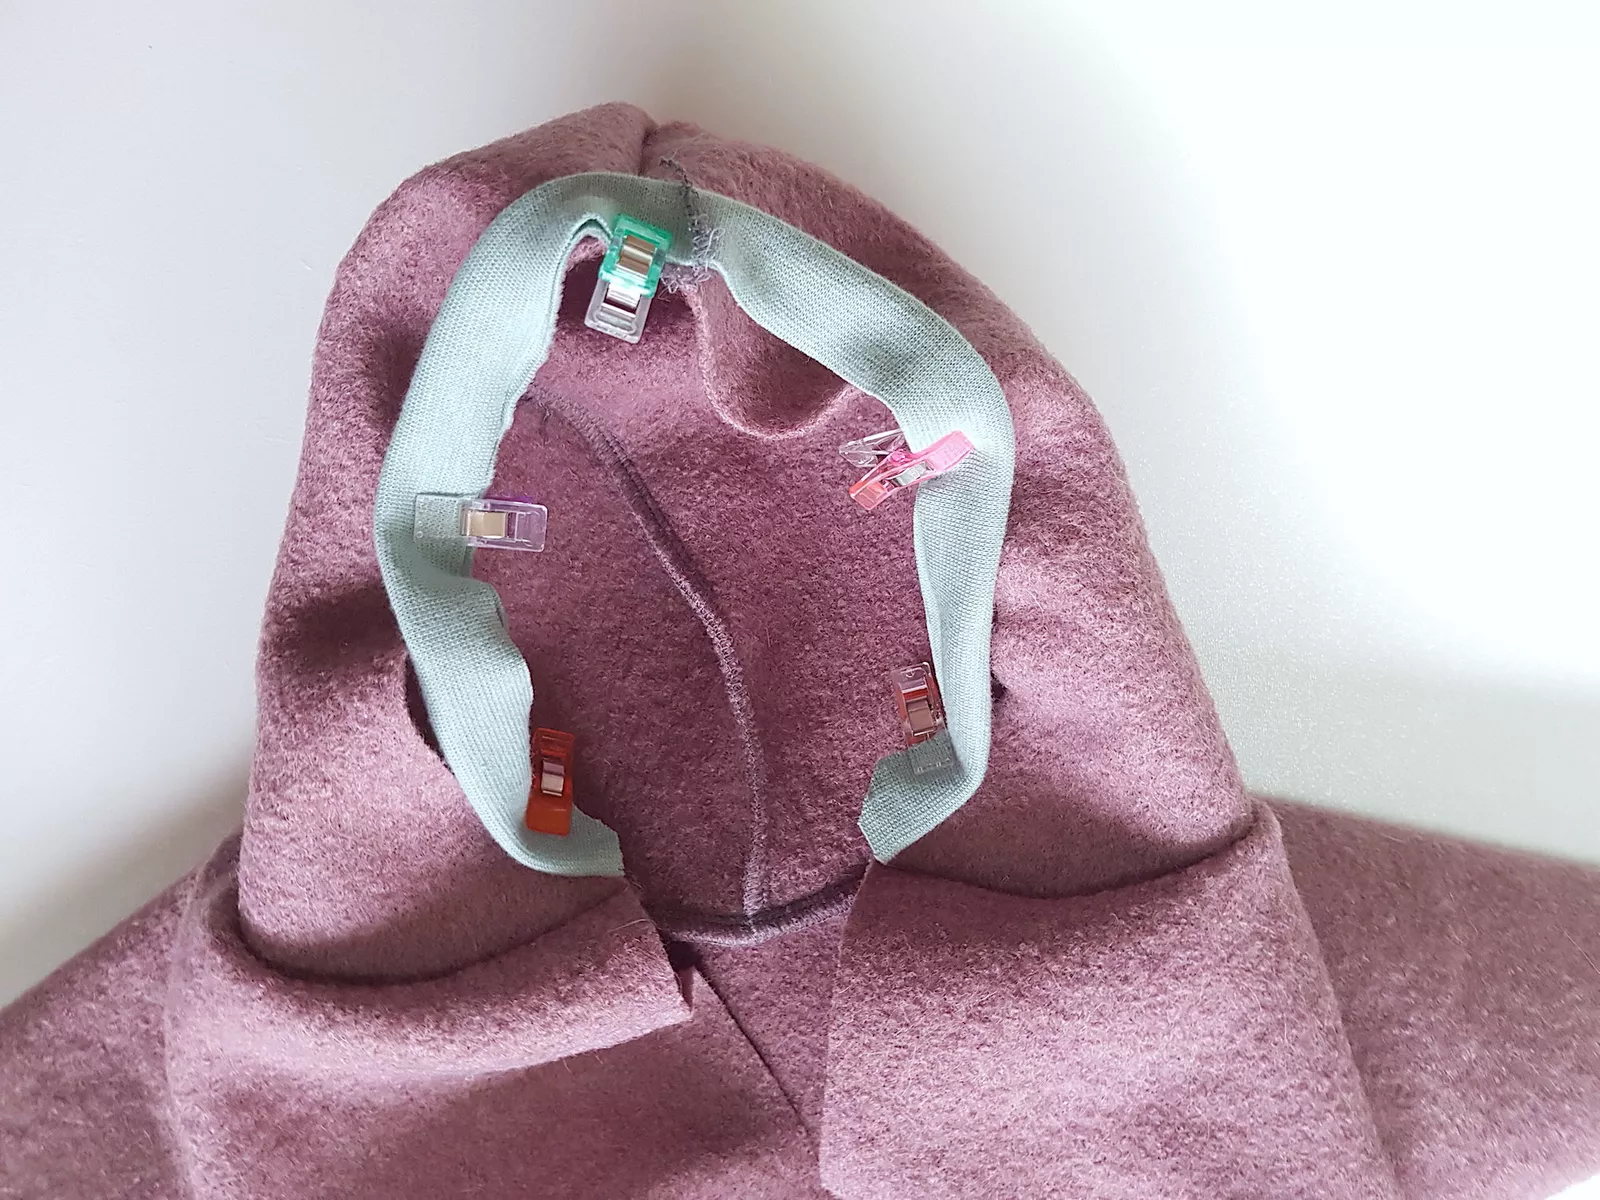
Step 9: Fold the hood cuff in half lengthwise, wrong sides together, and pin to the hood, right sides together.
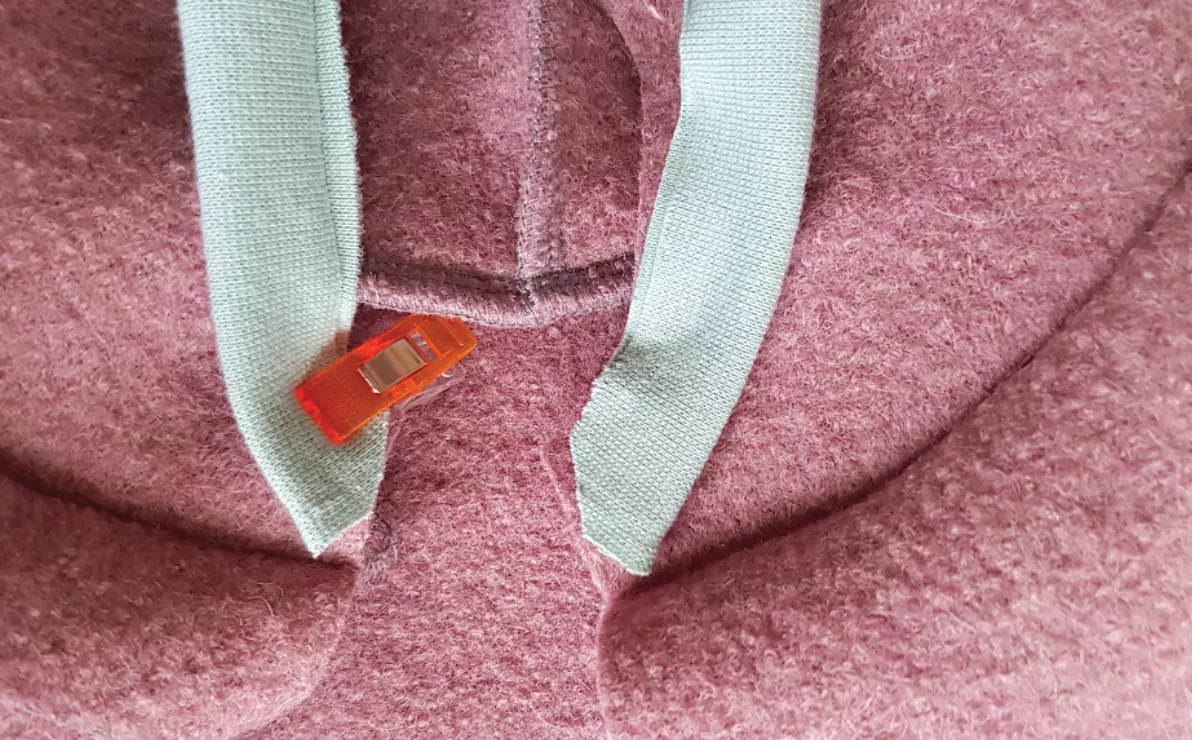
Step 10: Let the cuffs taper out at the centre front of the hood, or round off the corners.
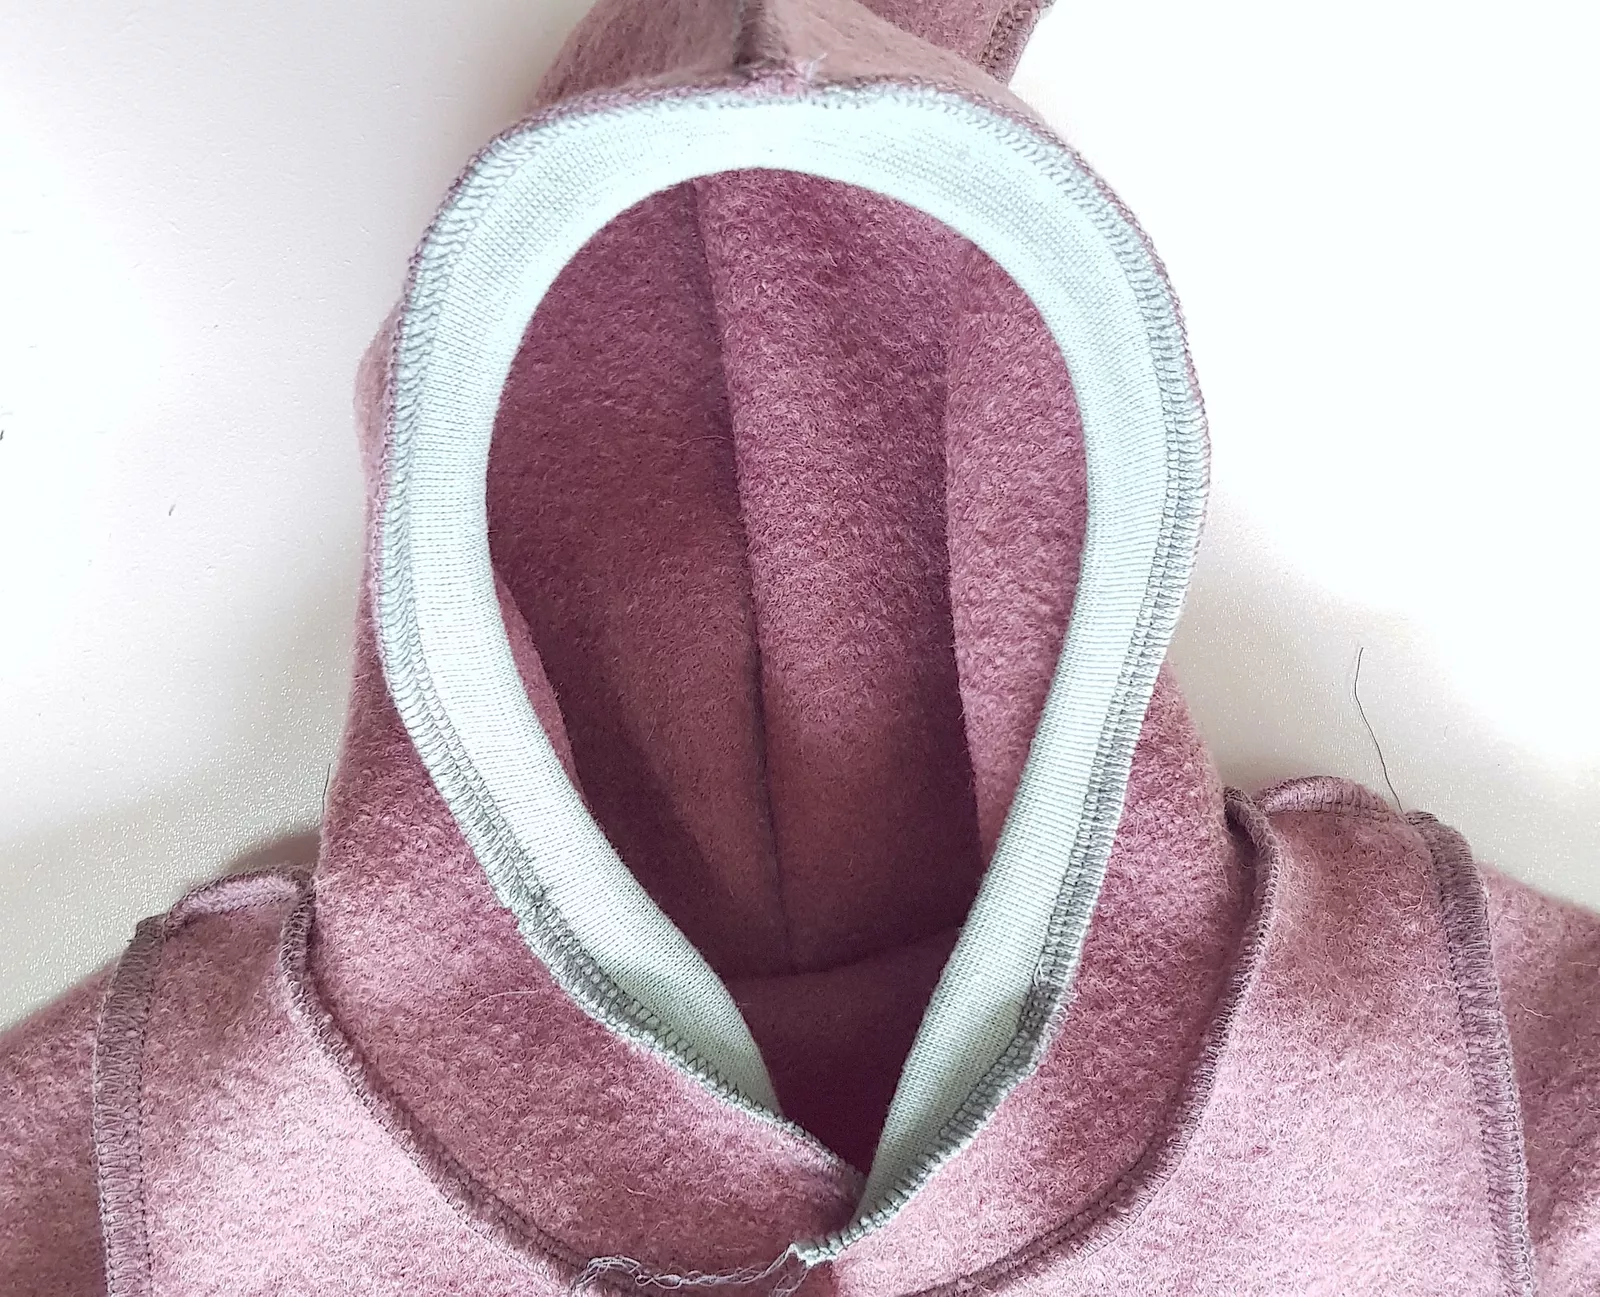
Step 11: Sew the stretched hood cuff to the hood.
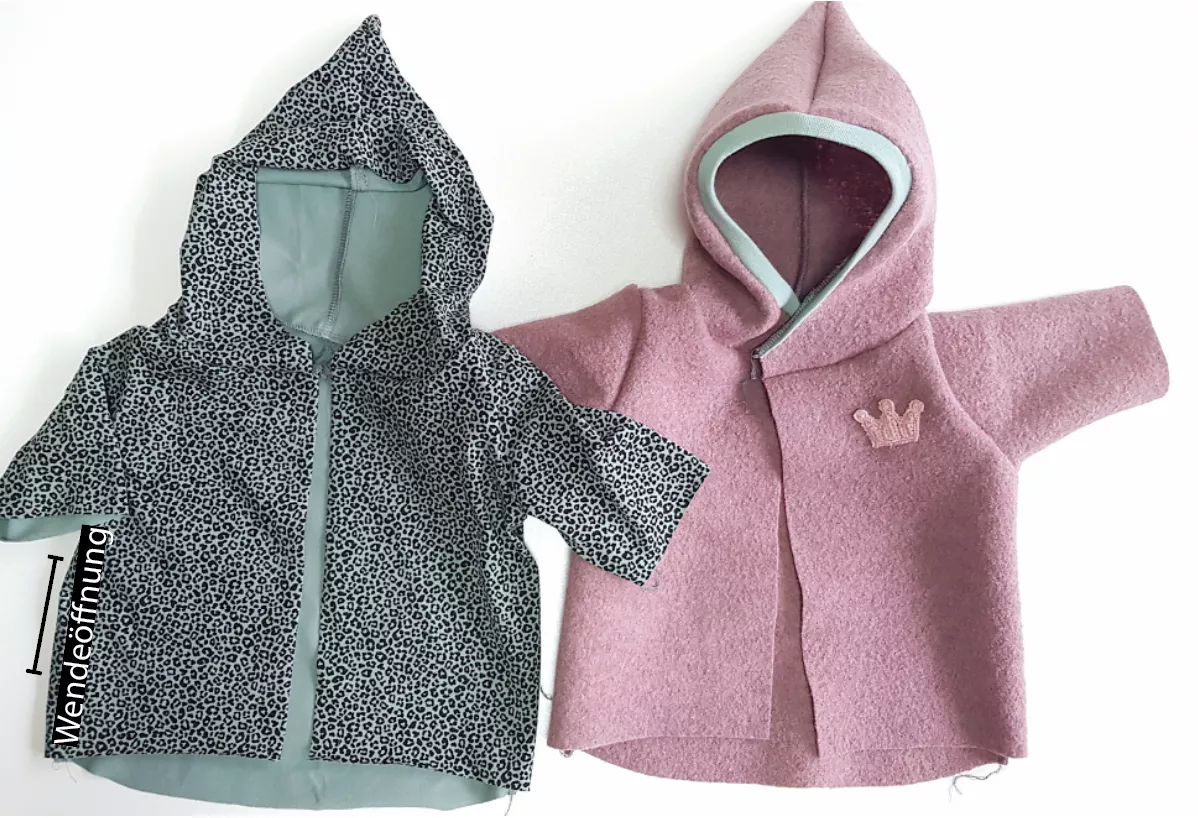
Step 12: Repeat the same with the inner jacket. The only difference is that you don't need a hood cuff here. Instead, you need a 10 cm long turning opening at the side seam.
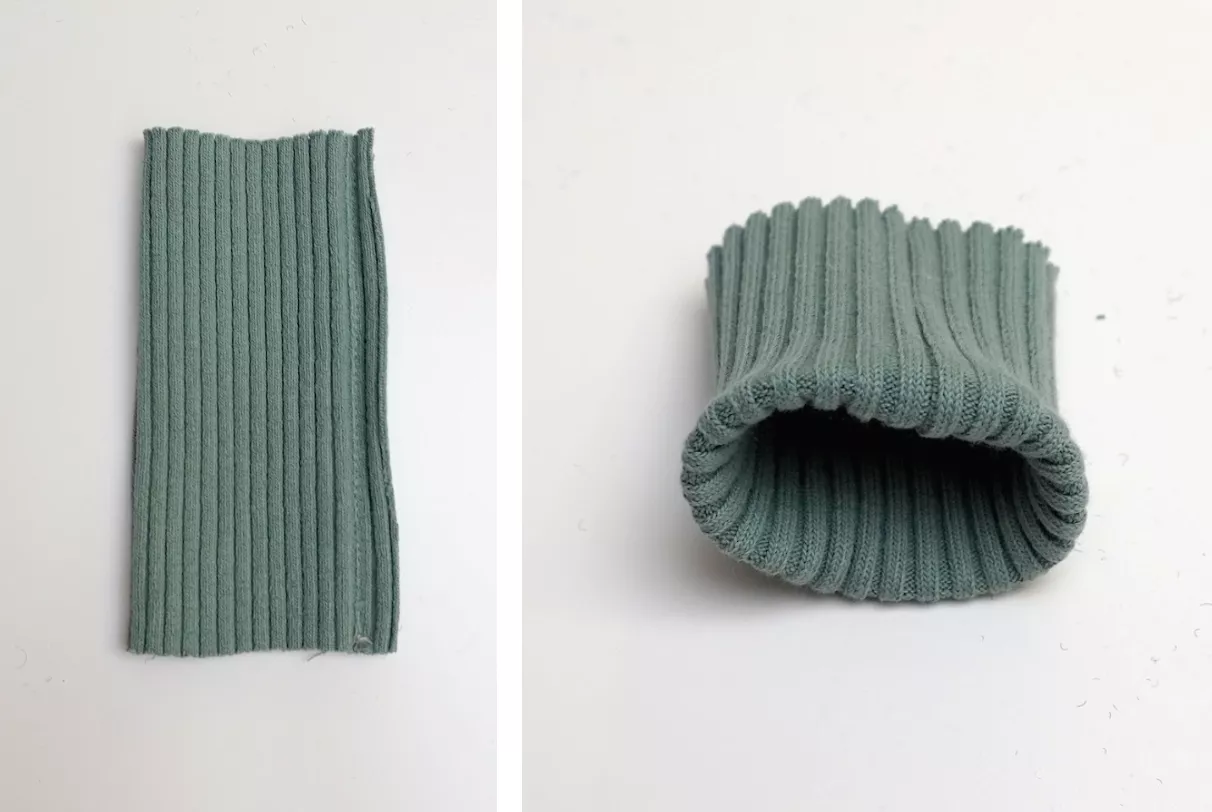
Step 13: Fold the cuffs in half with wrong sides together.
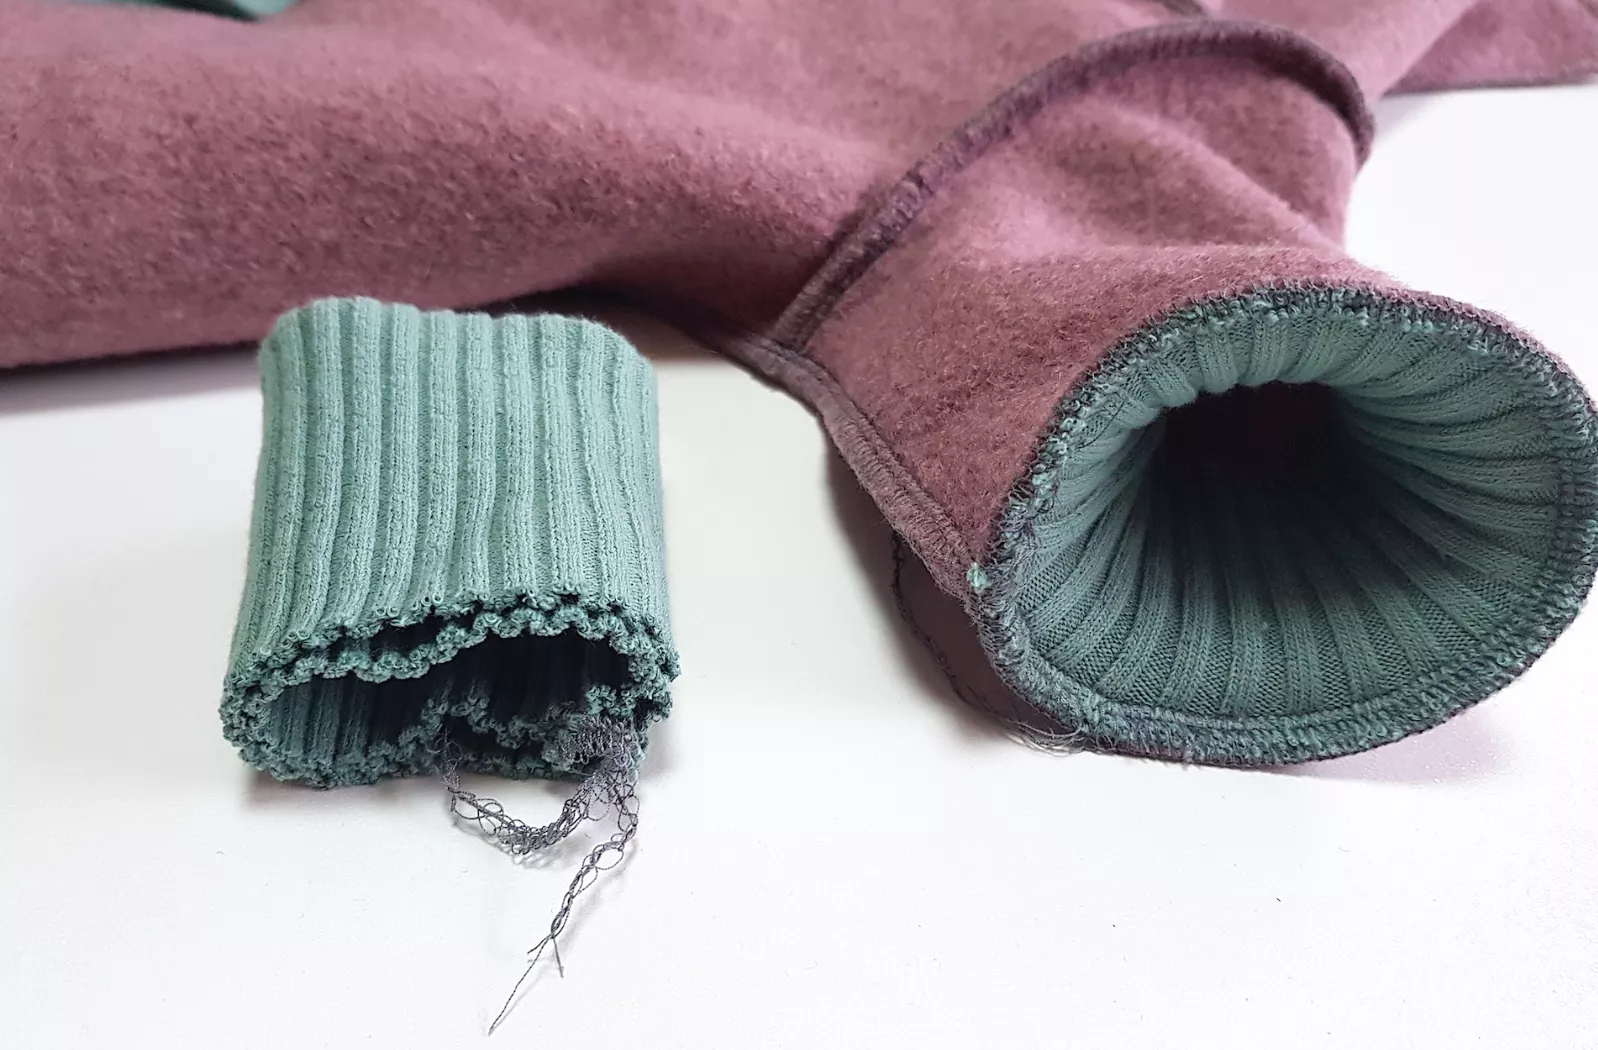
Step 14: Slide the cuff into the sleeve so the cuff and sleeve are right sides together and all raw edges aligned. Make sure to match the side seams. Pin and sew.
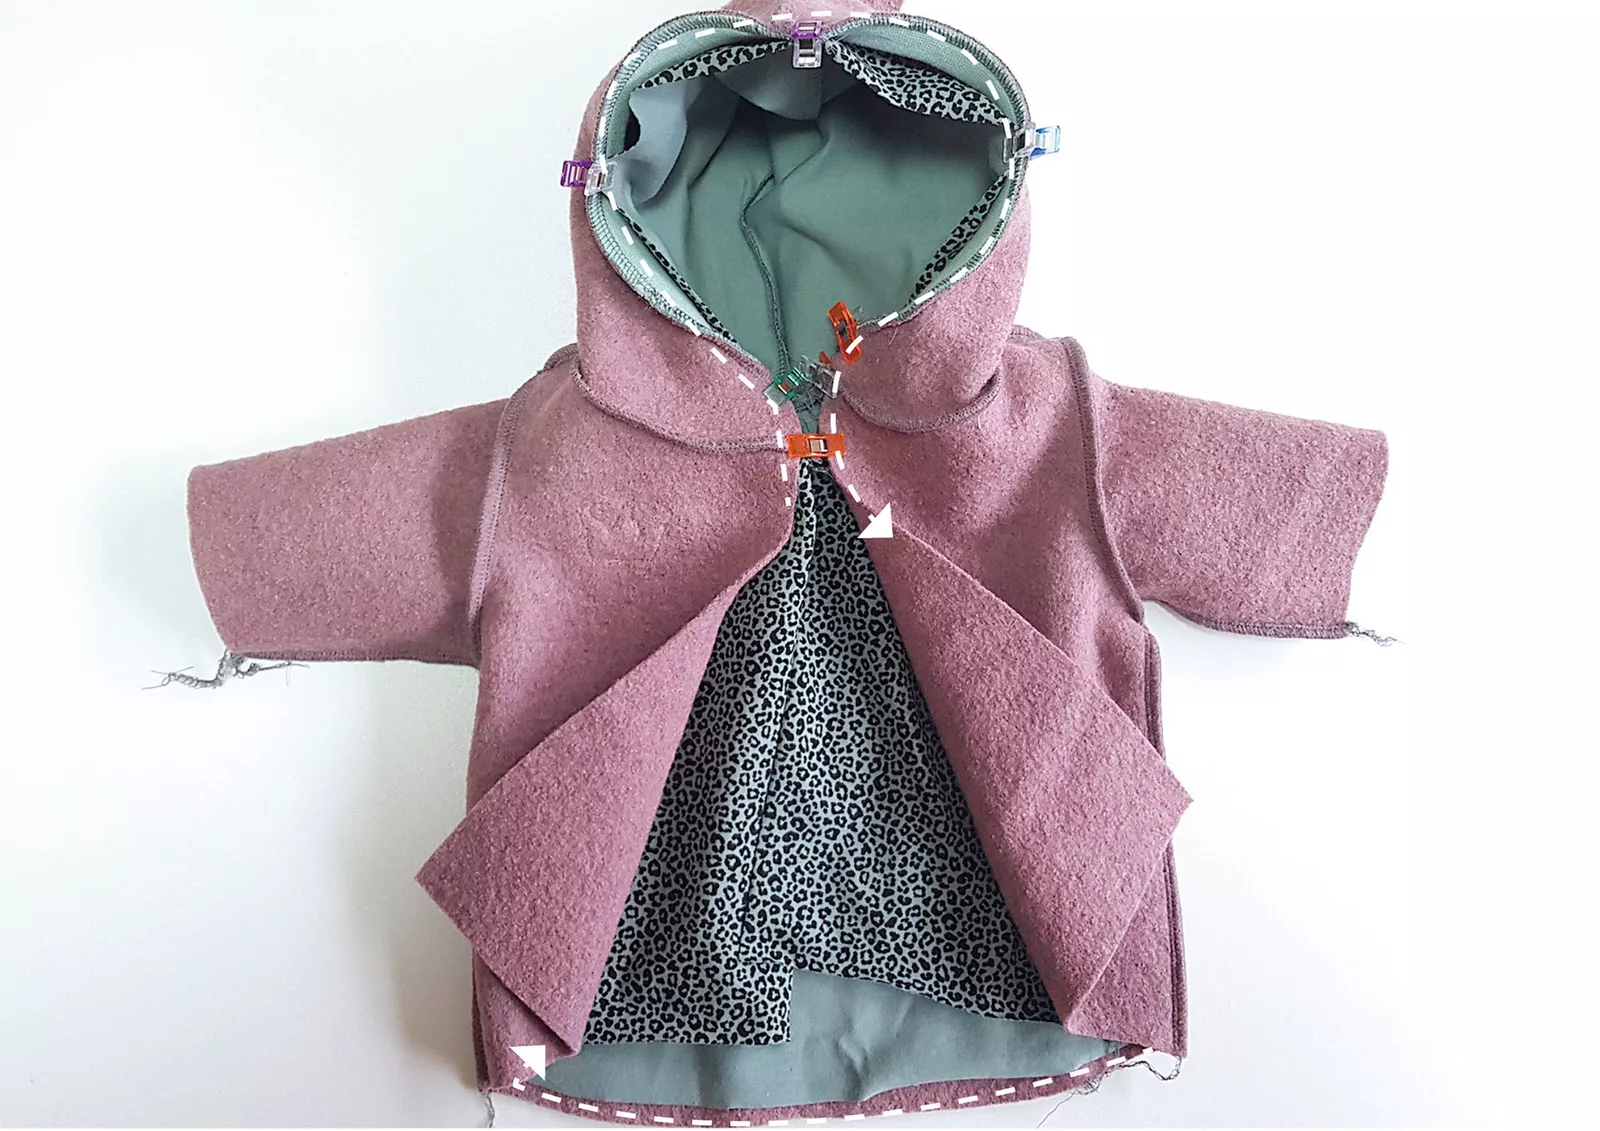
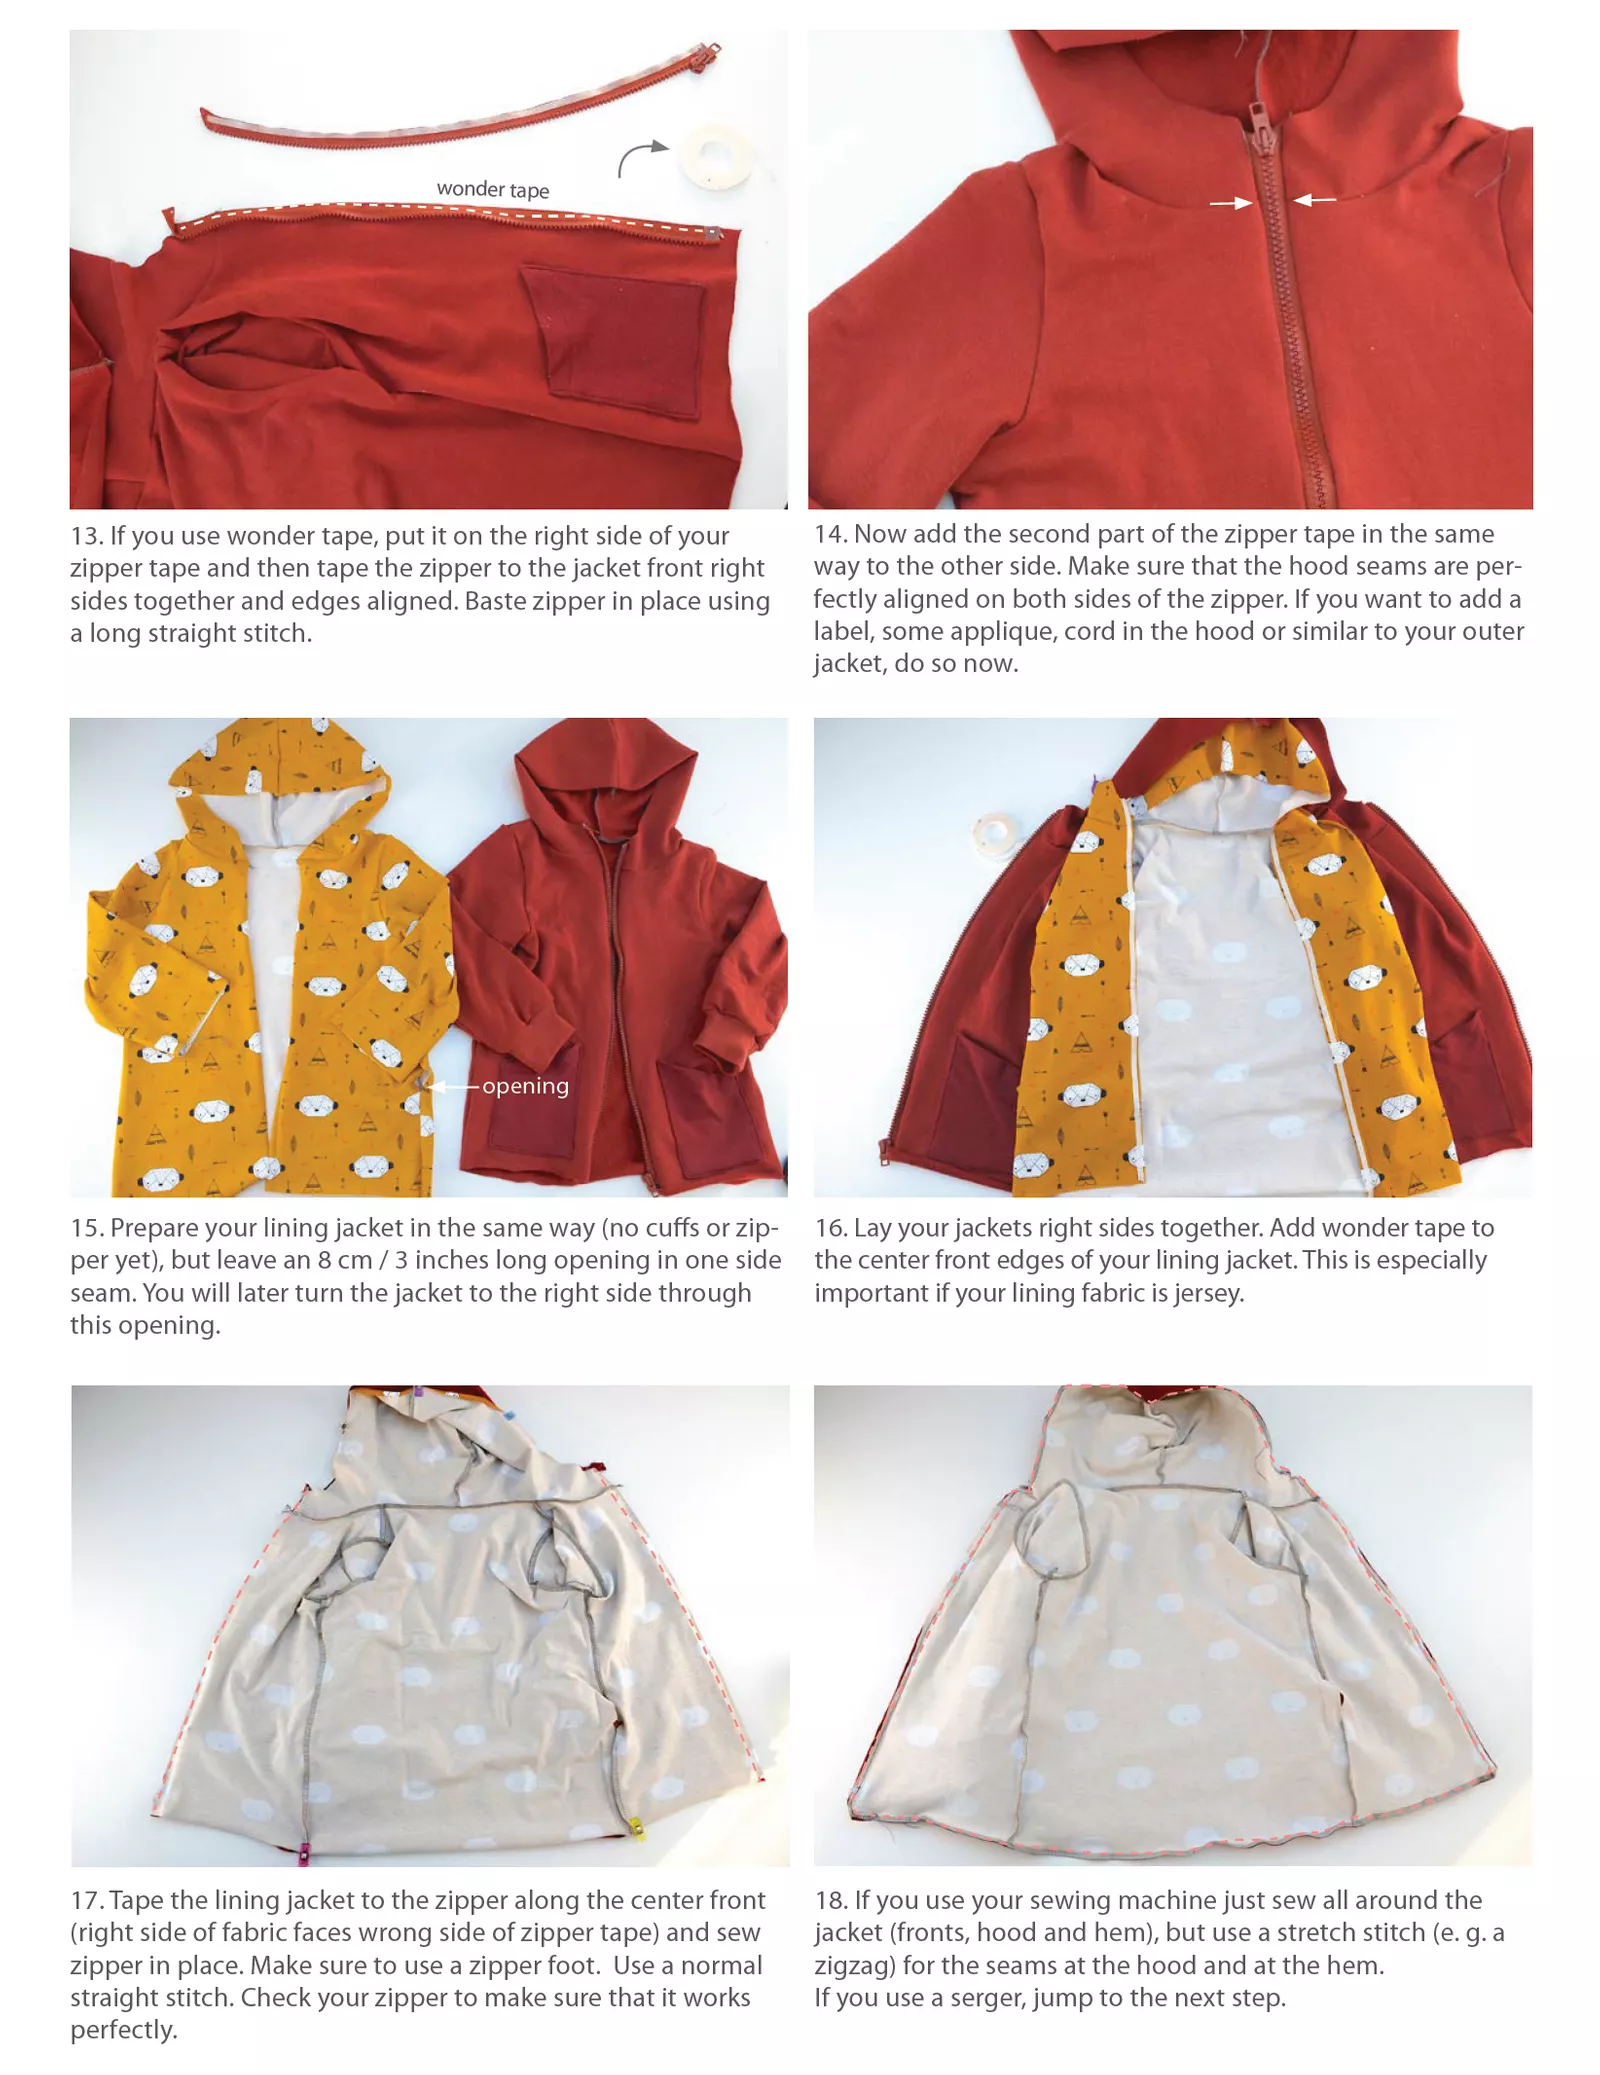
Step 15: Lay your jackets right sides together. Add wonder tape to the center front edges of your lining jacket. This is especially important if your lining fabric is jersey.
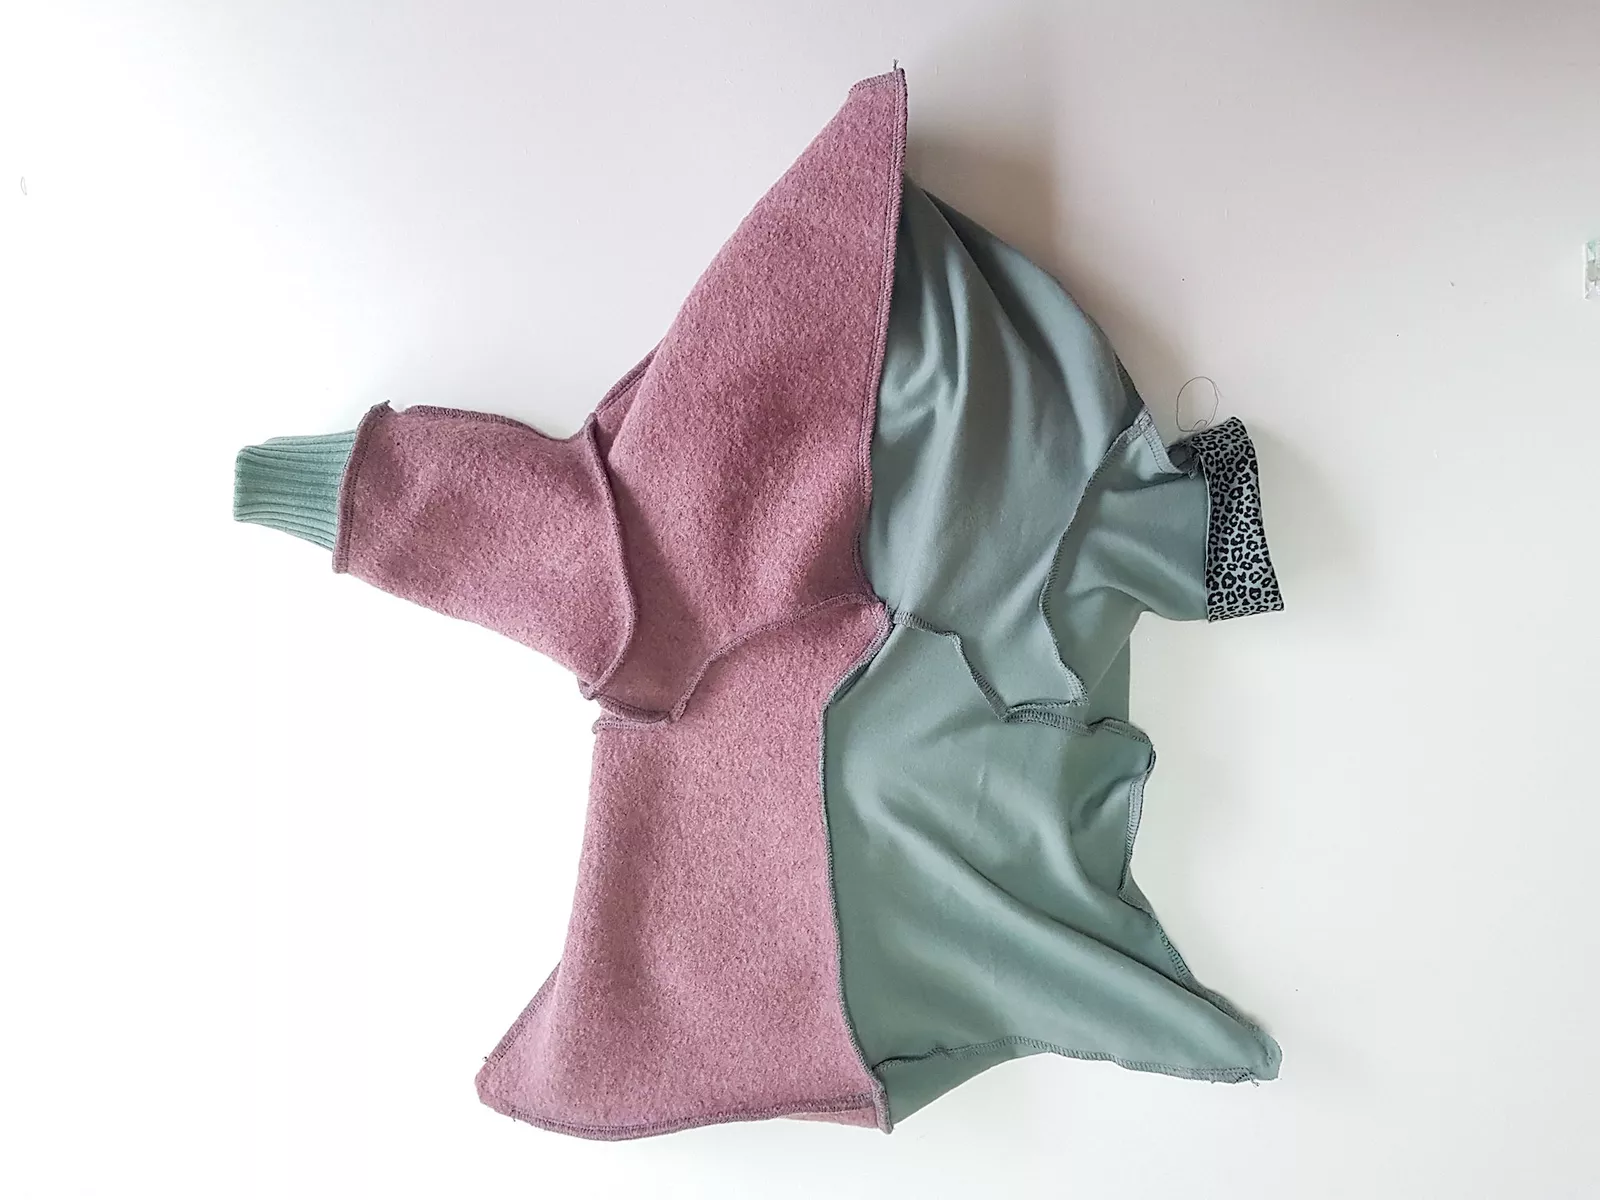
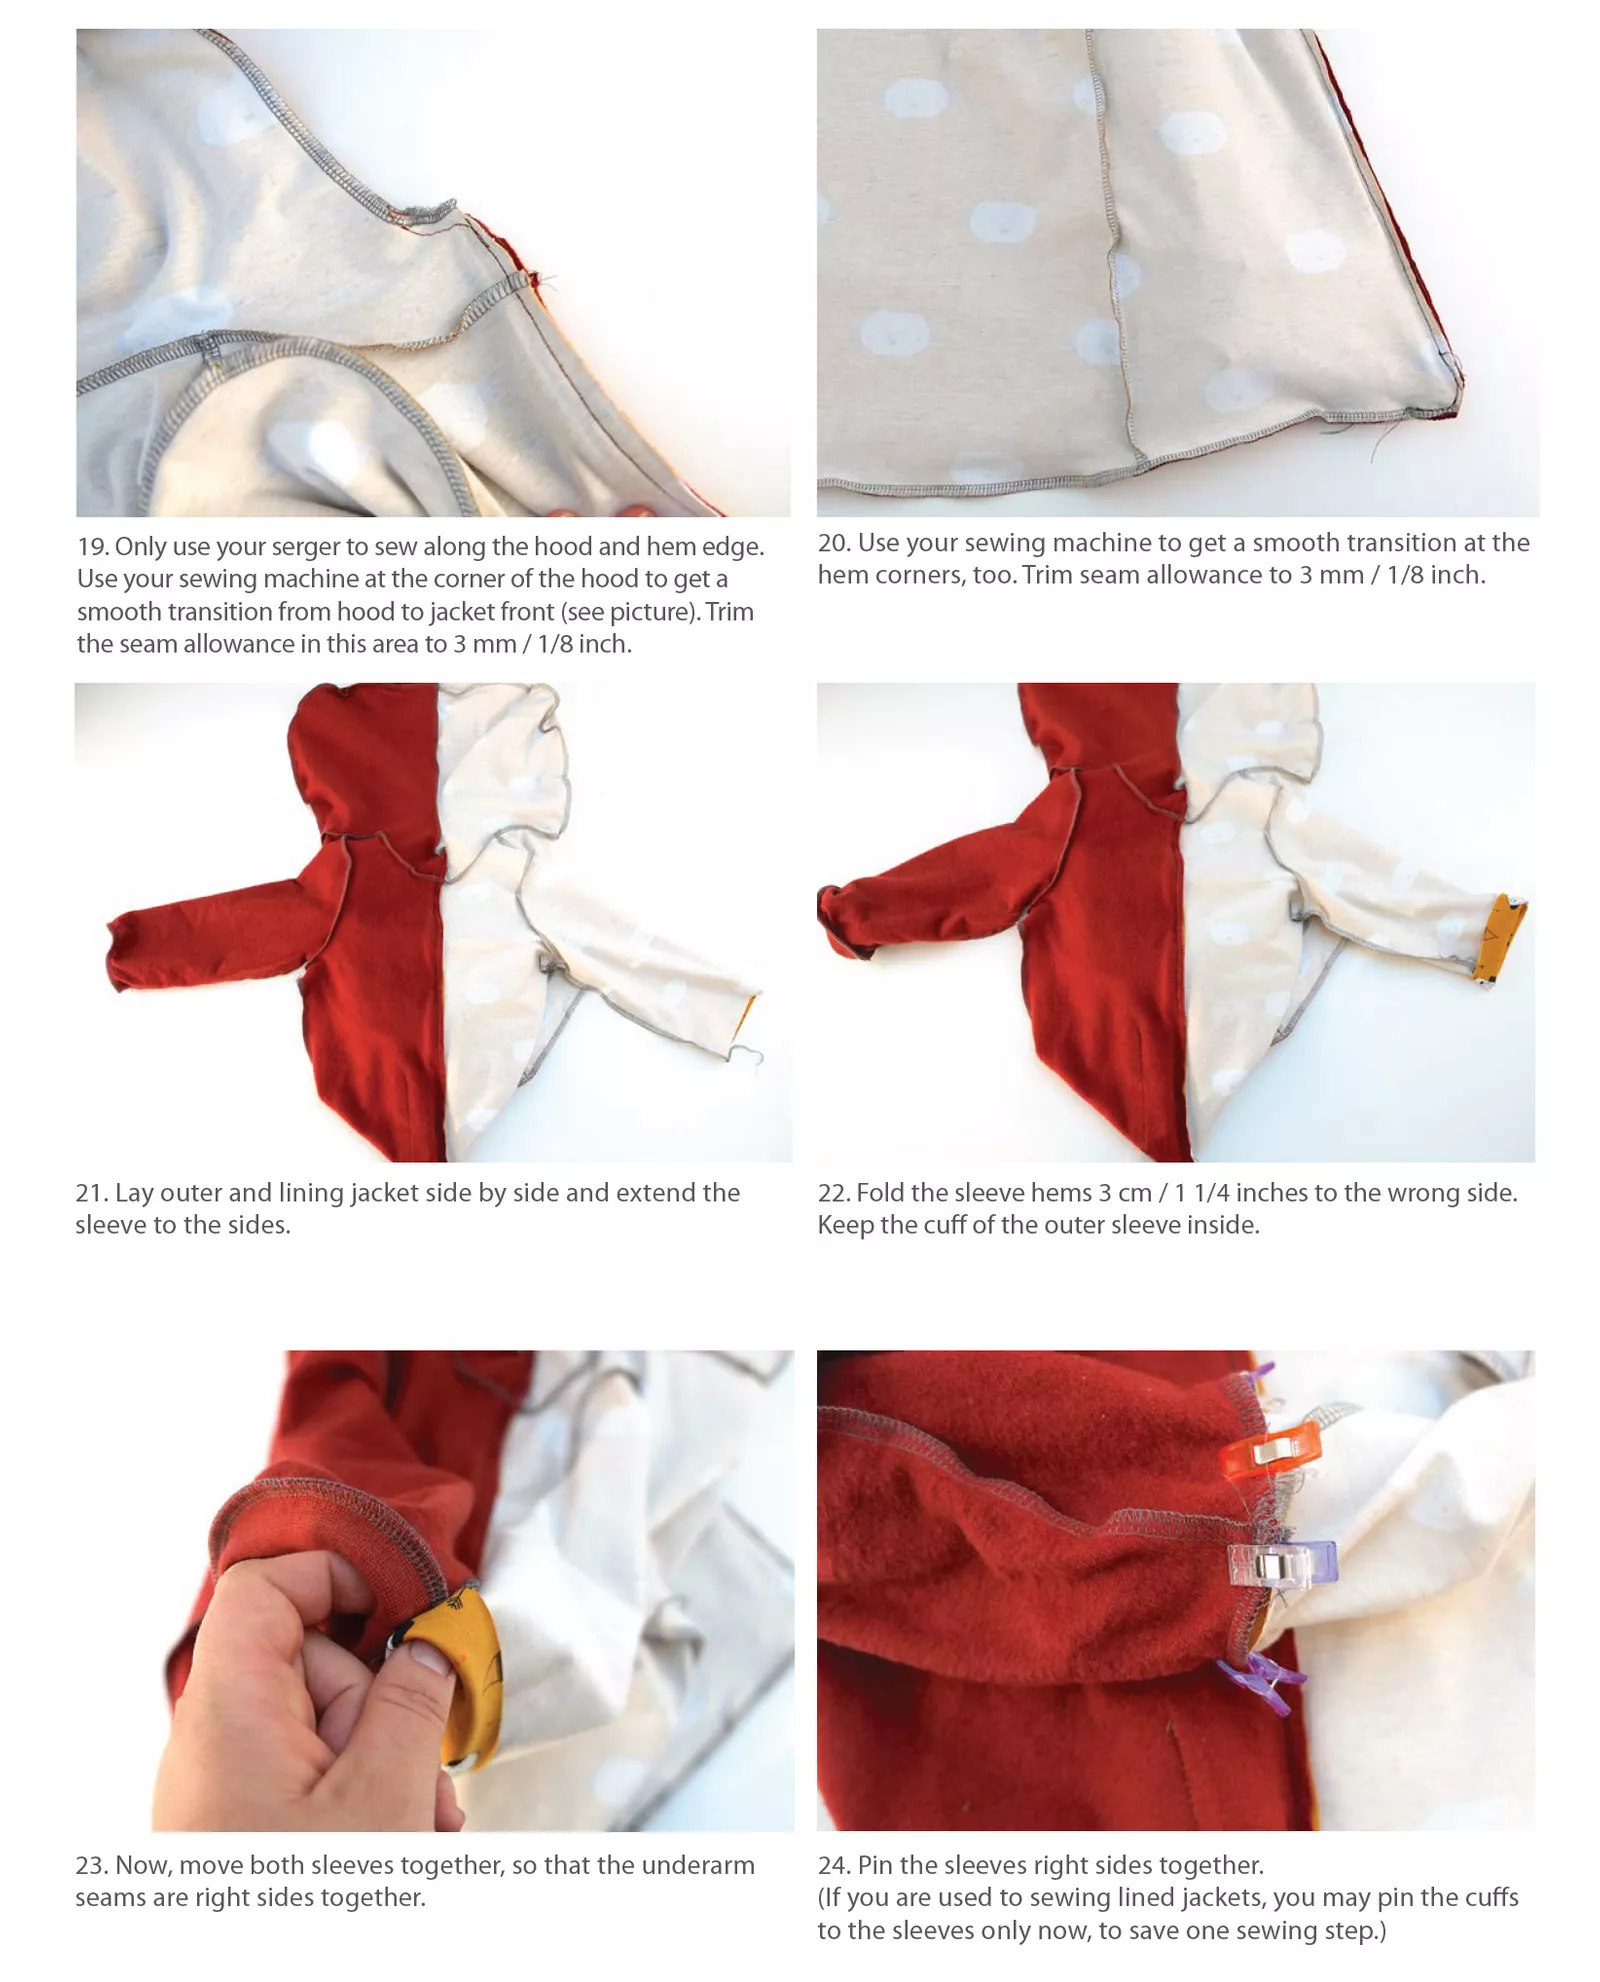
Step 16: Lay outer and lining jacket side by side and extend the sleeve to the sides.
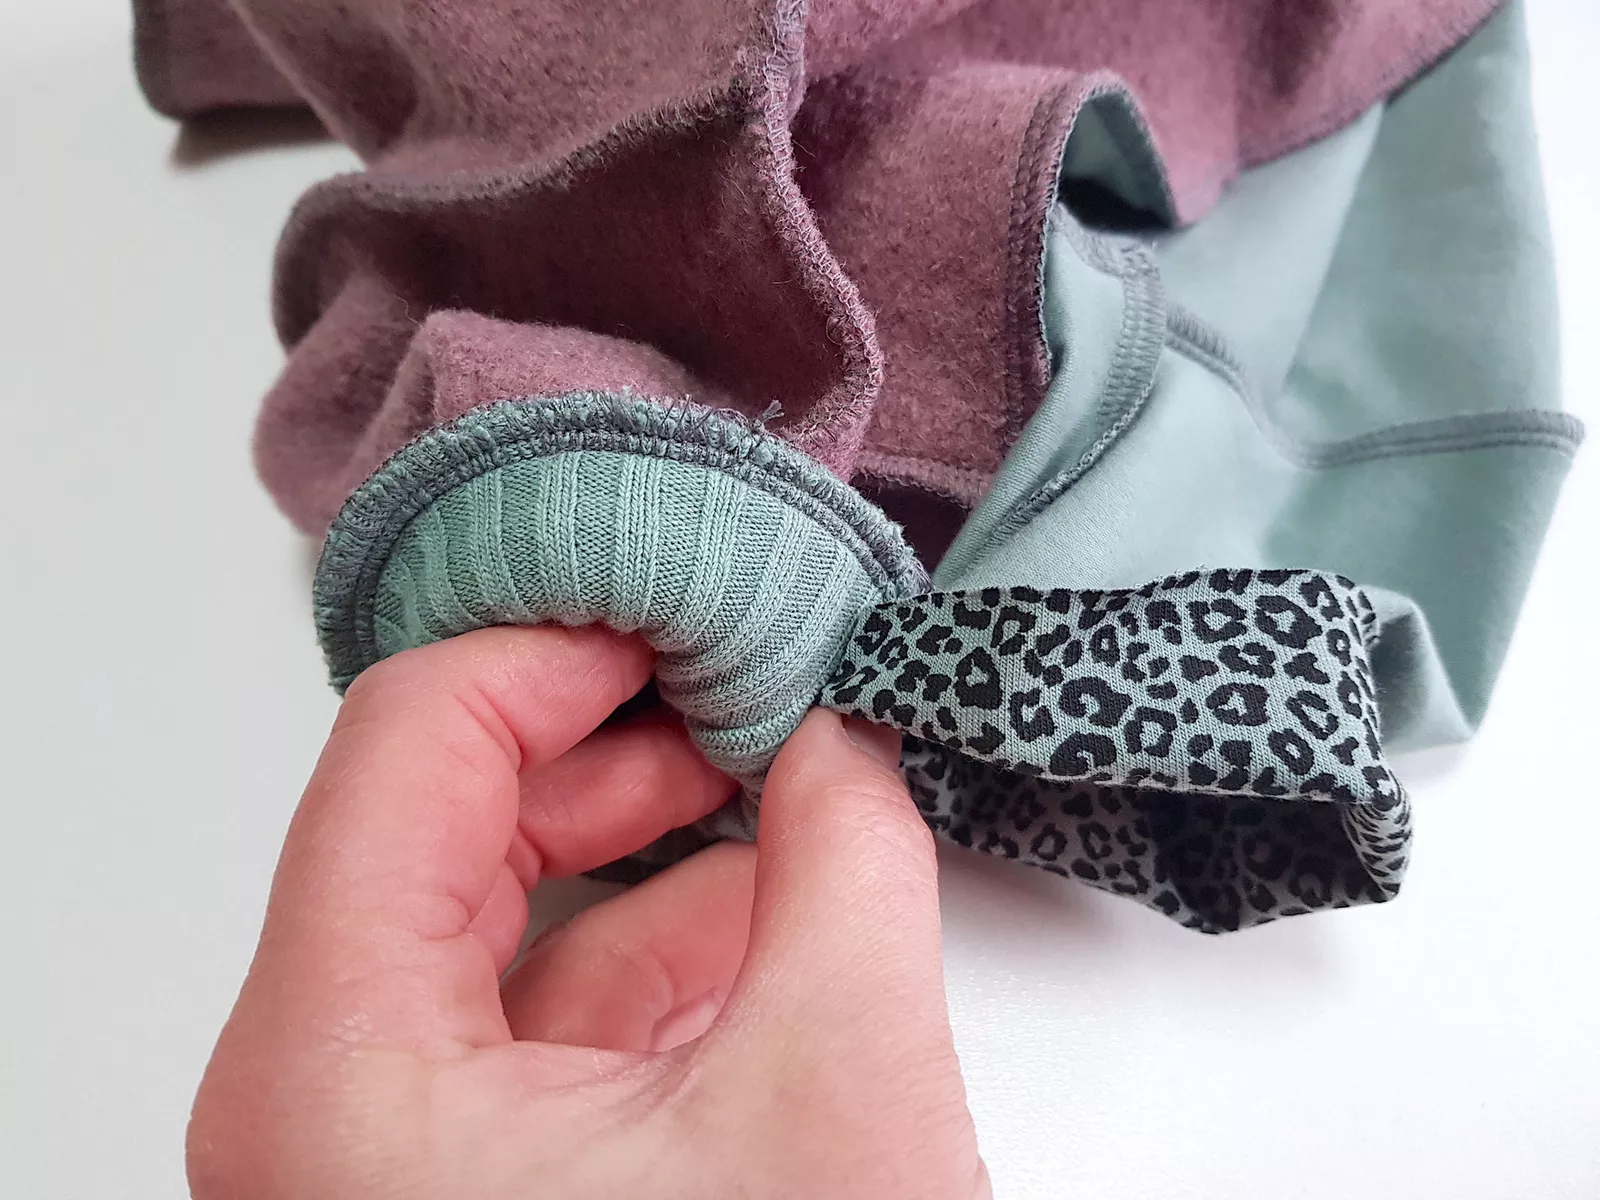
Step 17: Fold the sleeve hems 3 cm / 1 1/4 inches to the wrong side. Keep the cuff of the outer sleeve inside.
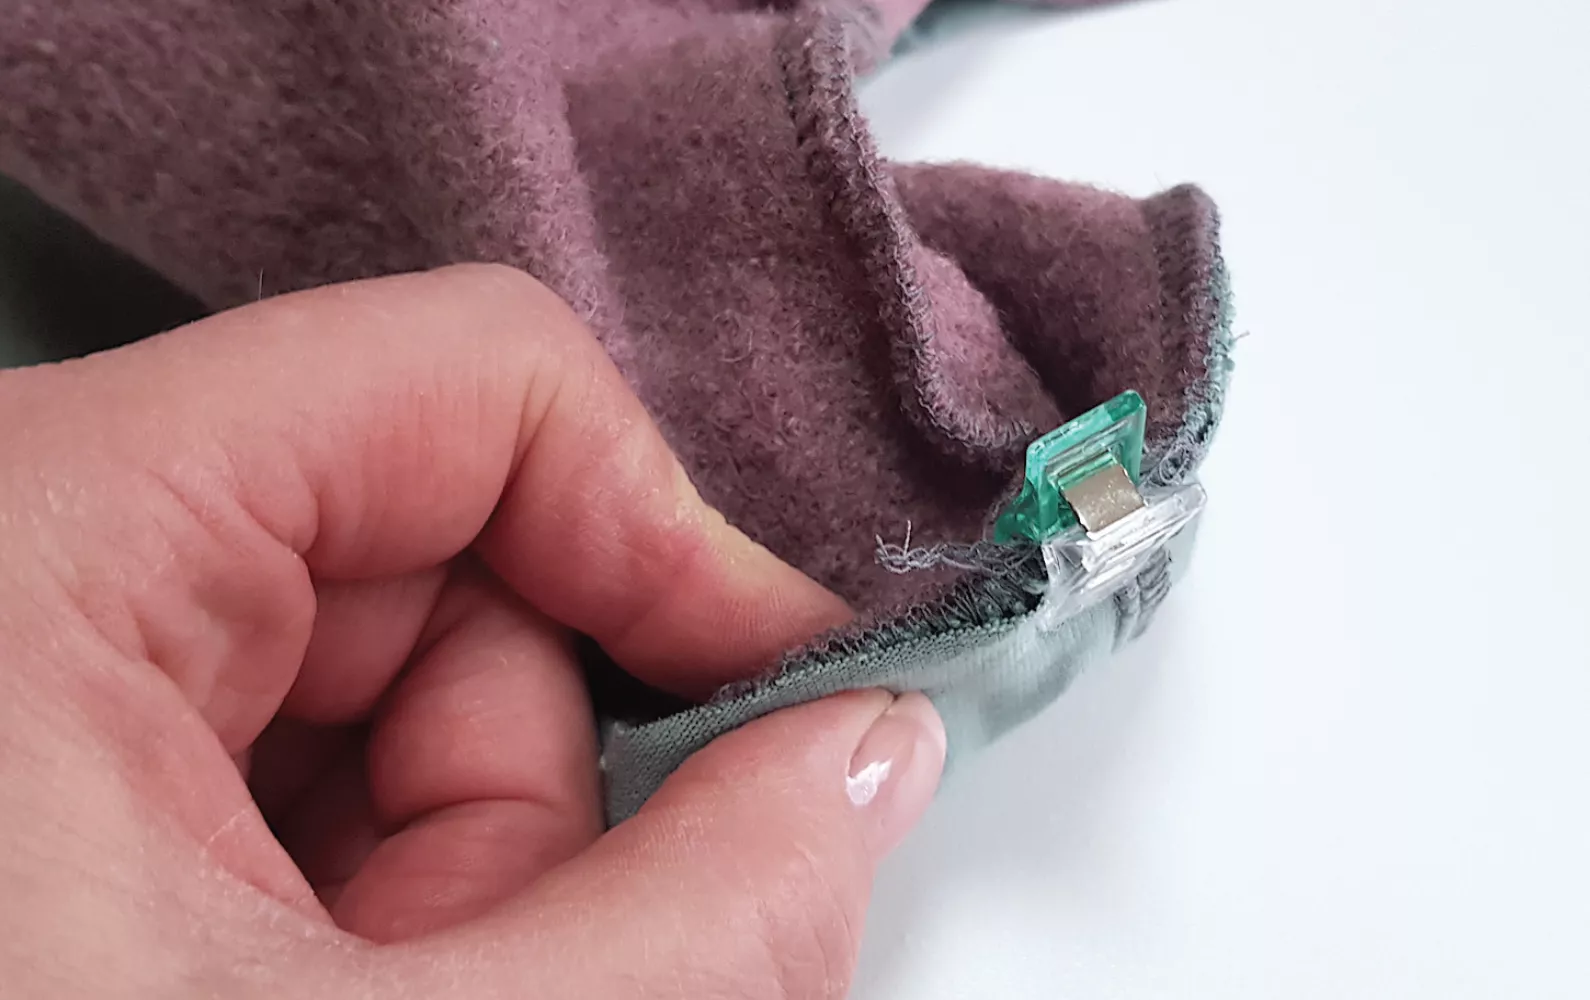
Step 18: Pin the sleeves right sides together. (If you are used to sewing lined jackets, you may pin the cuffs to the sleeves only now, to save one sewing step.)

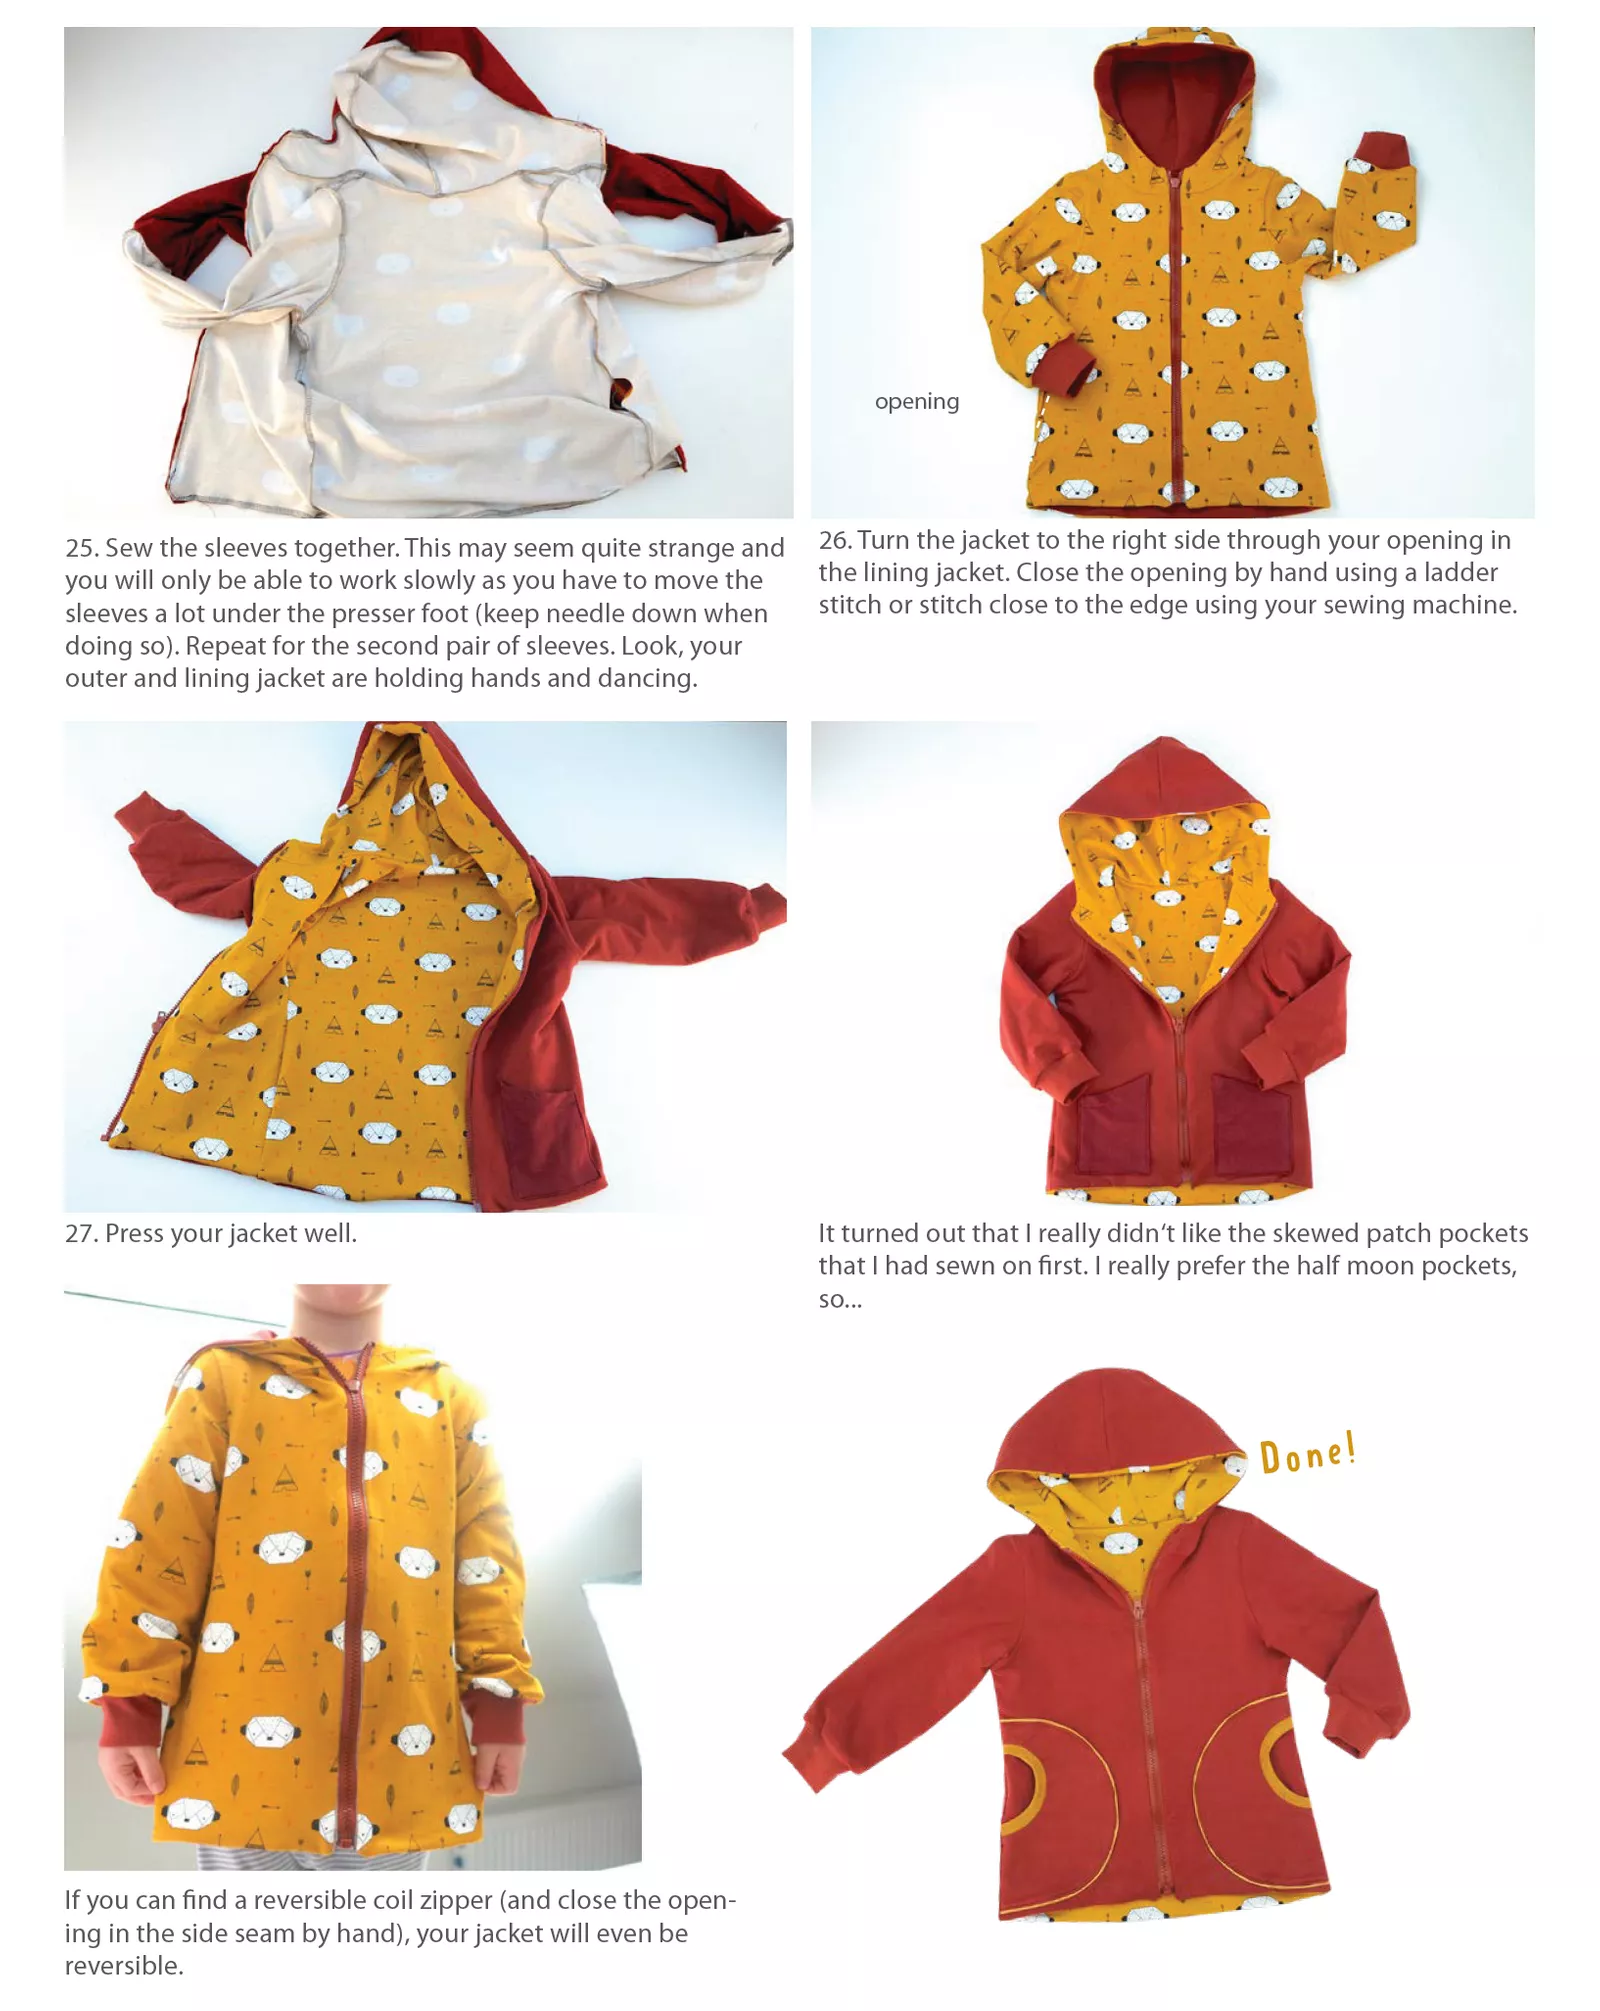
Step 19: Sew the sleeves together. This may seem quite strange and you will only be able to work slowly as you have to move the sleeves a lot under the presser foot (keep needle down when doing so). Repeat for the second pair of sleeves. Look, your outer and lining jacket are holding hands and dancing.
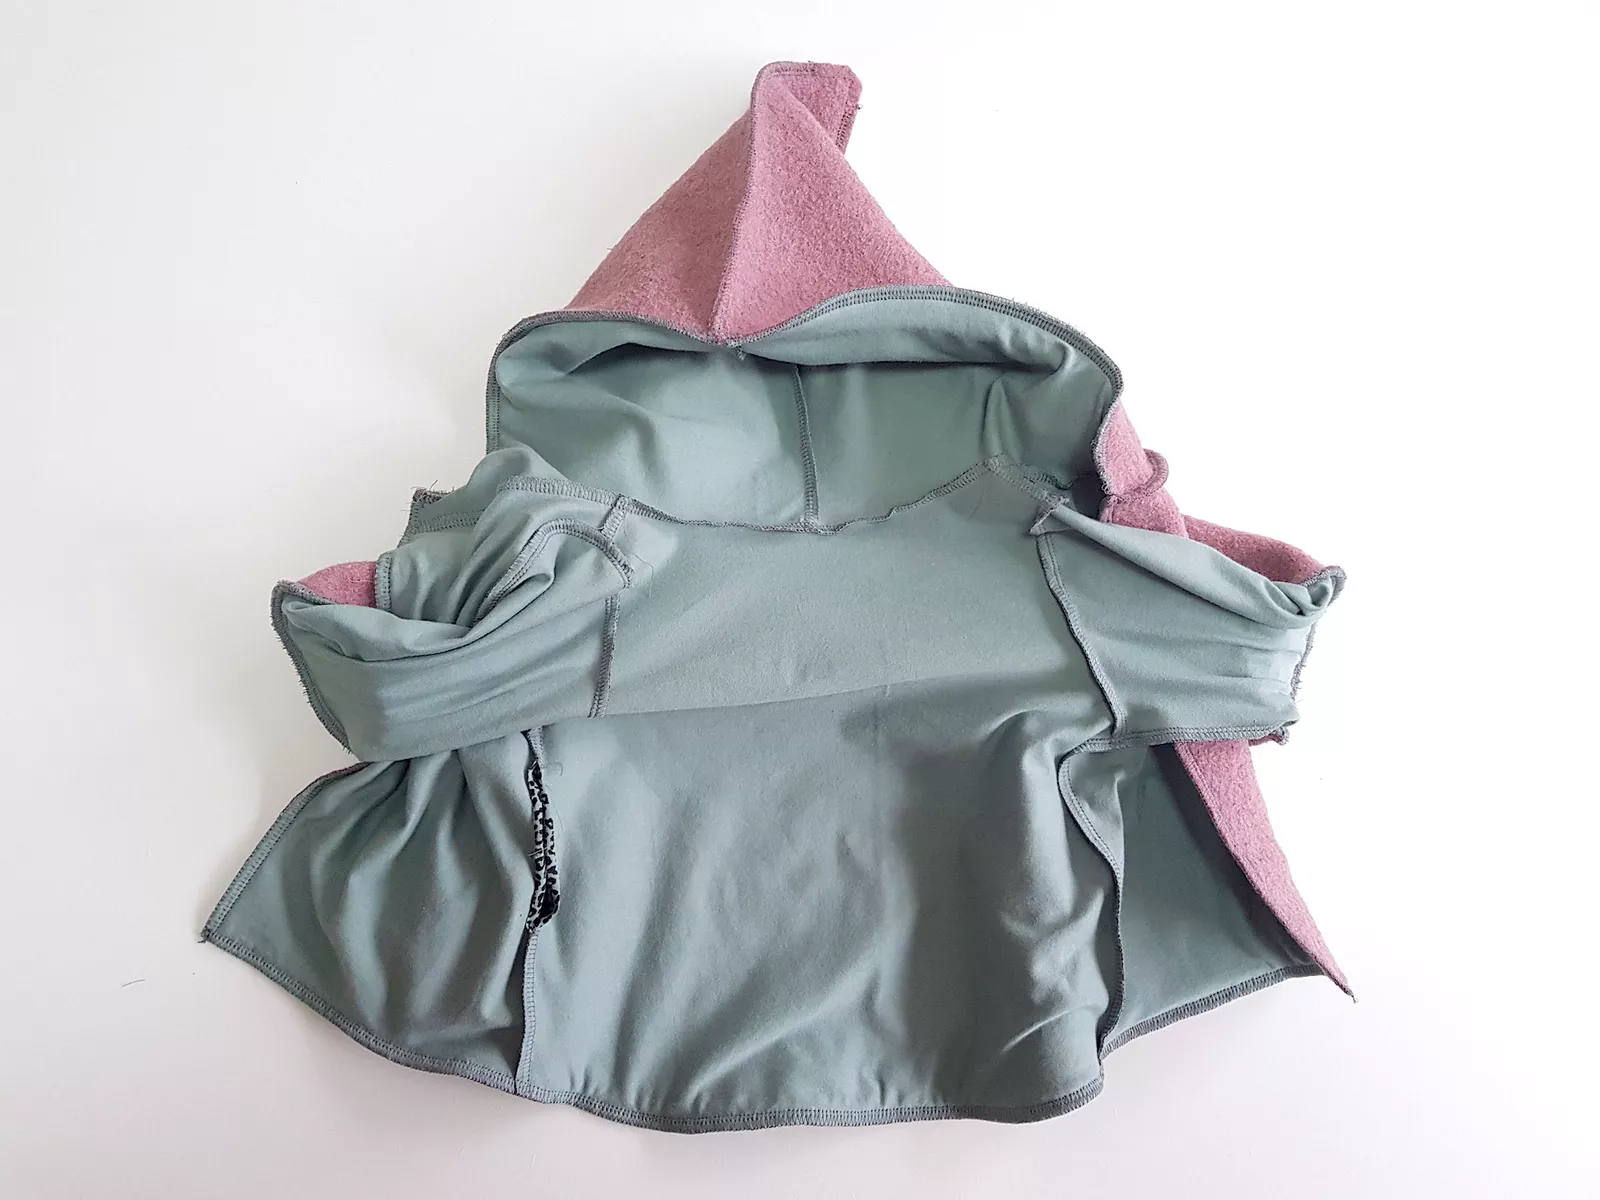
Step 20: If there are two dancing jackets here now, everything has been done right.
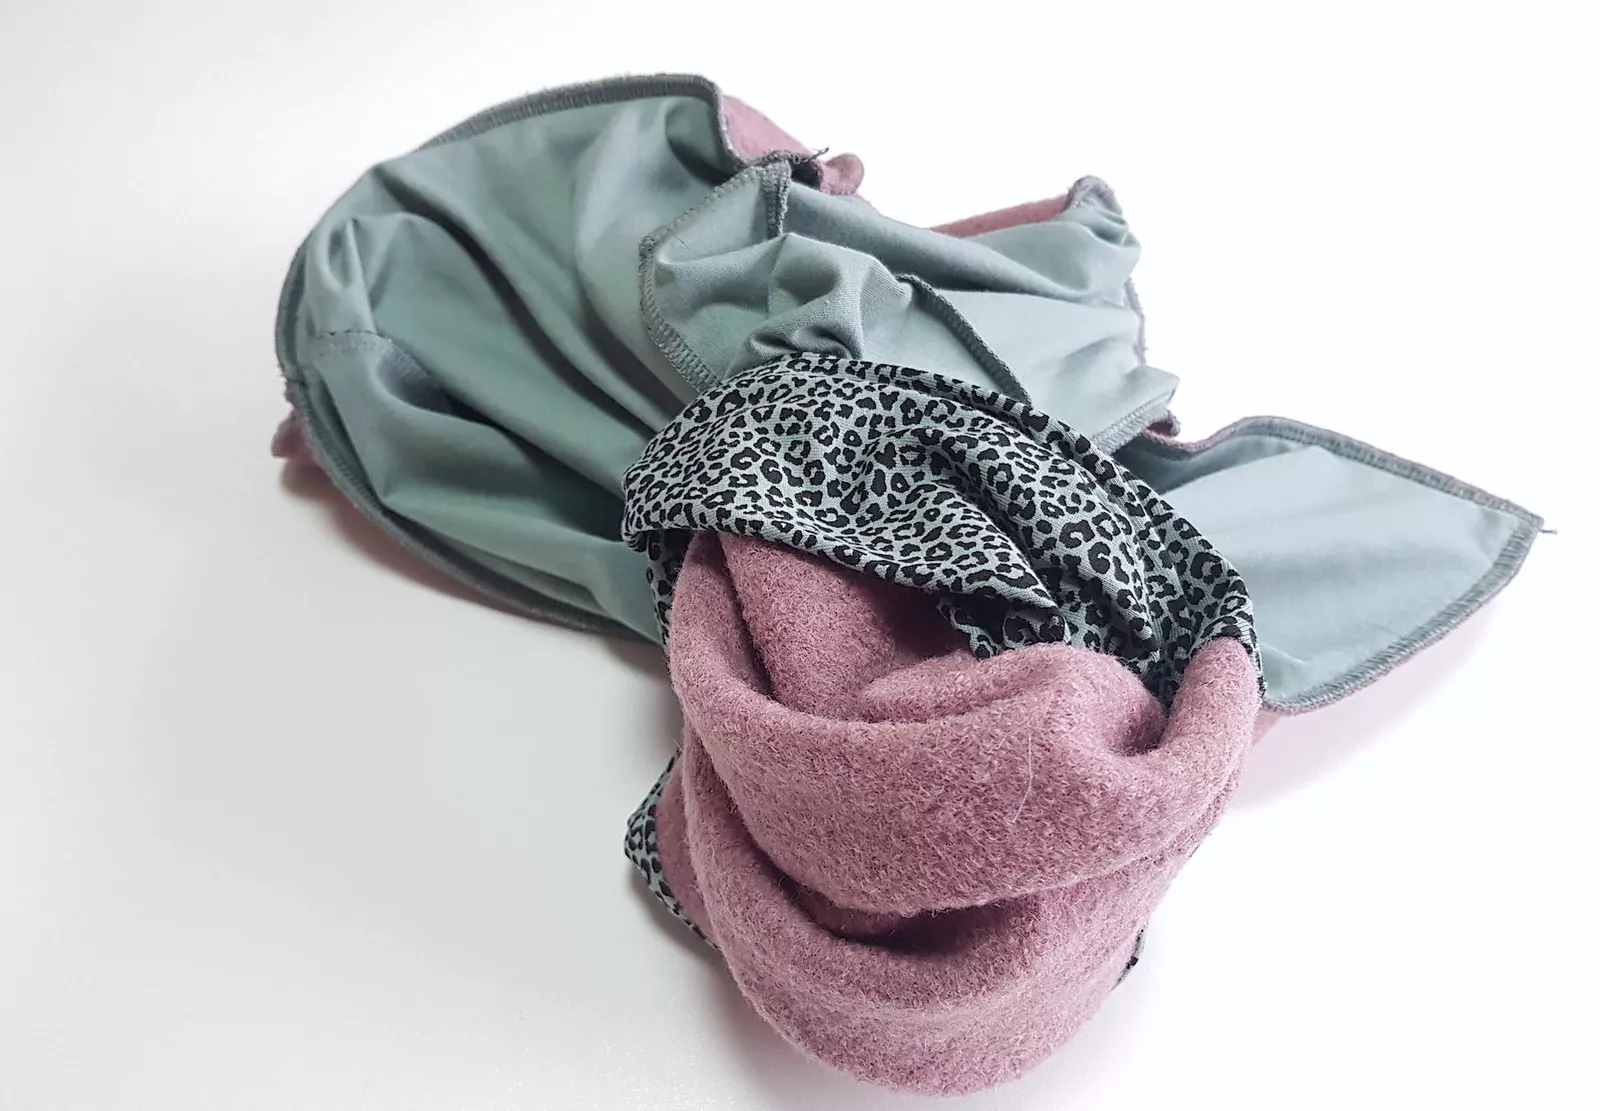
Step 21: Turn the jacket through the turning opening. Then close it with a straight stitch (with the sewing machine) or by hand with the (invisible) mattress stitch.
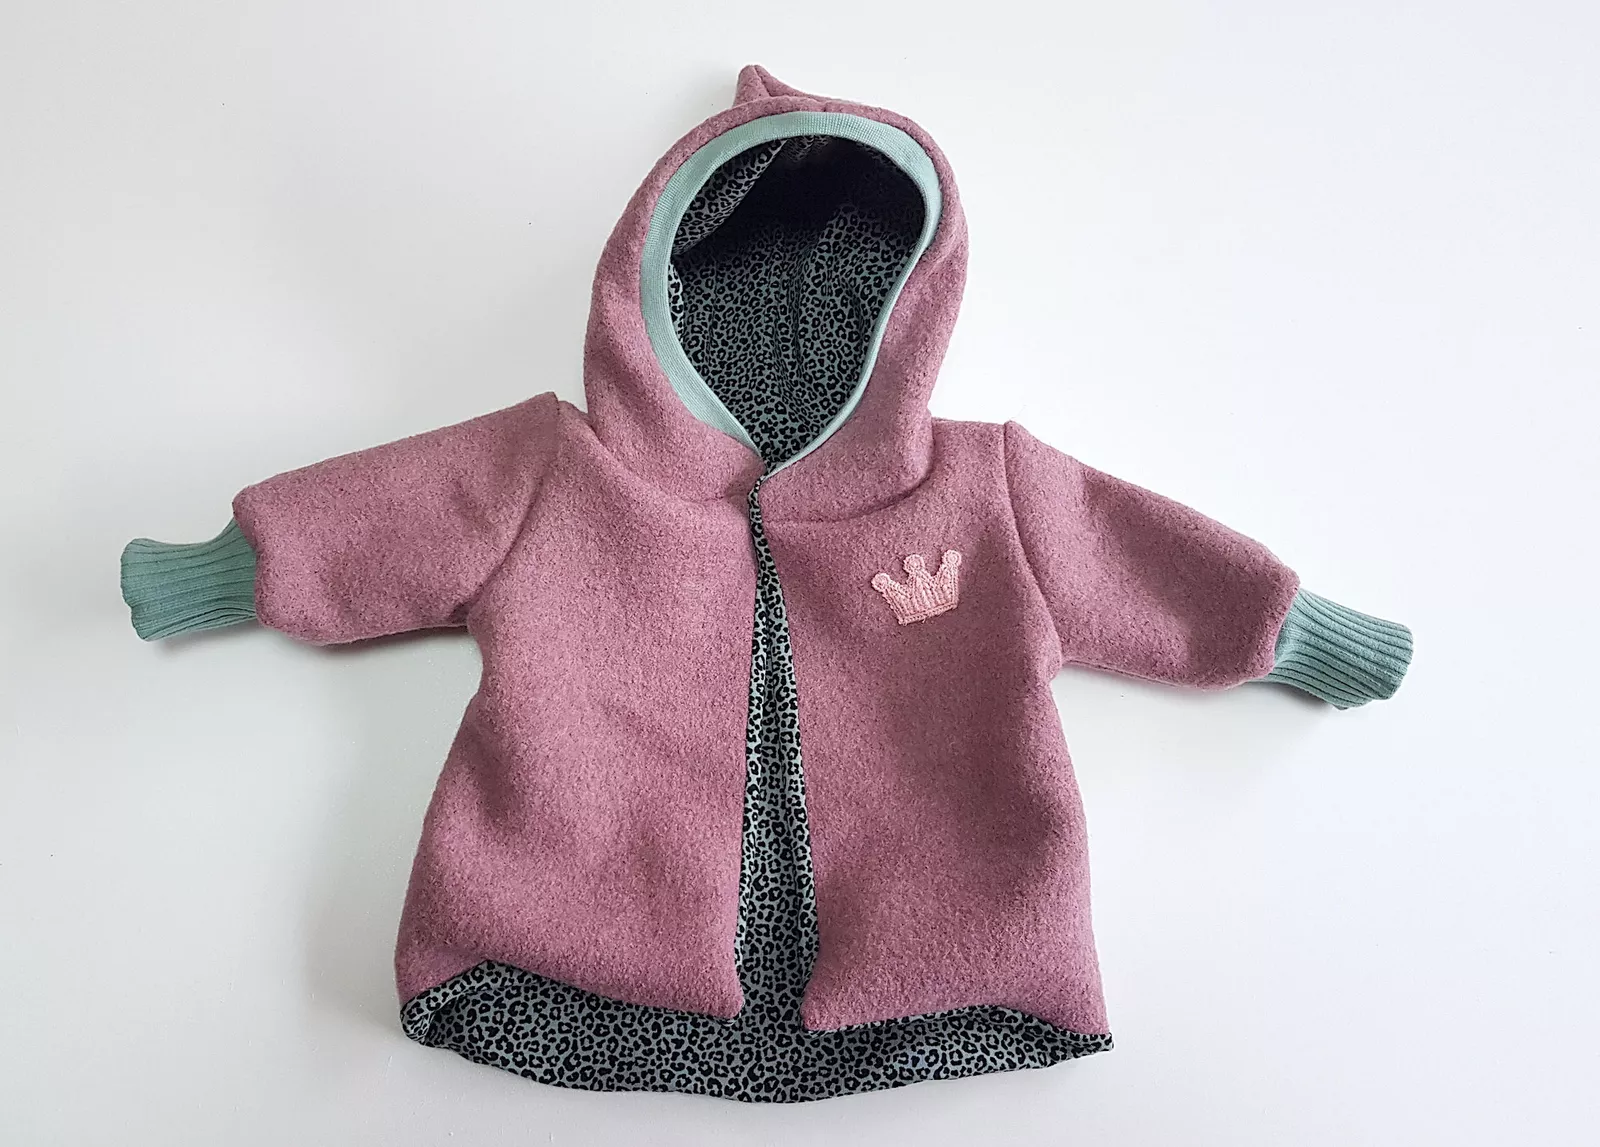
Step 22: Only the buttons and topstitching are missing. By the way: if the rather loose jersey lining "hangs" too much, you can fix it with a few stitches at the neck and underarms.
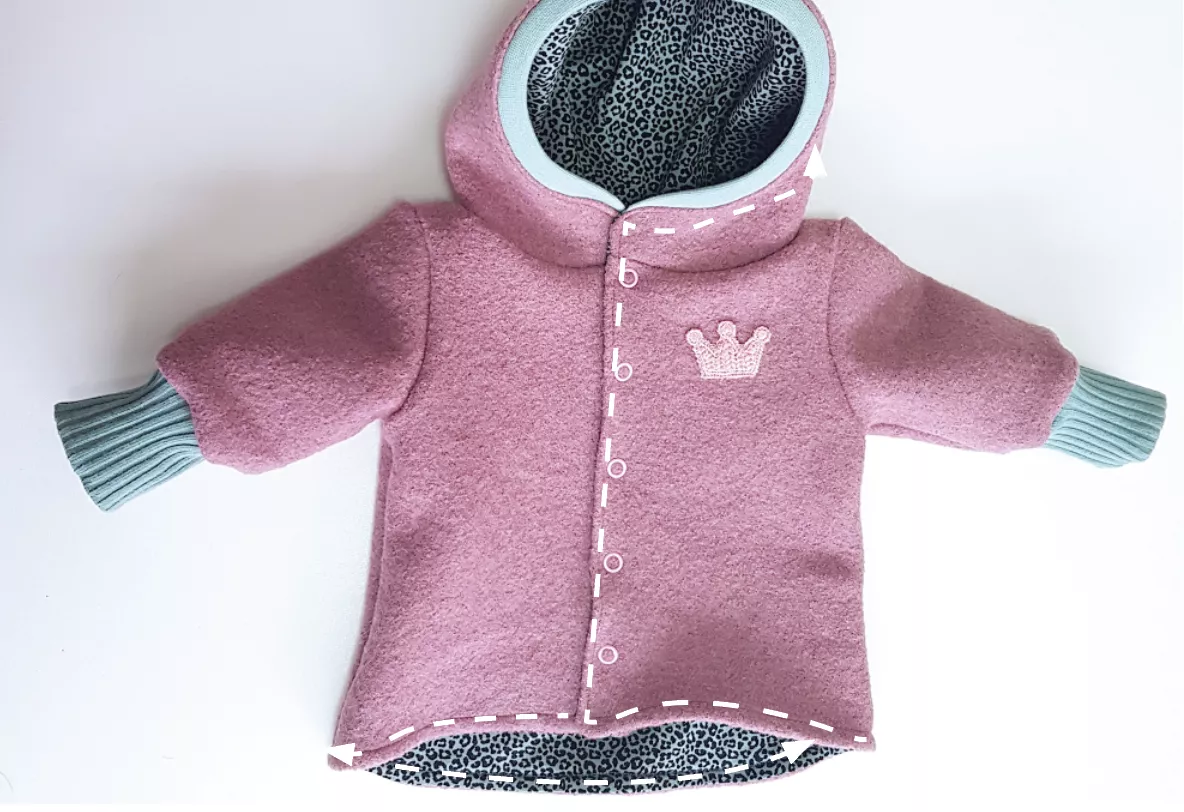
Step 23: Now topstitch once all around with a wide straight stitch. Not too close to the edge. Leave a gap of approx. 3 mm to the edge at the centre front. At the bottom hem approx. 7 - 10 mm.
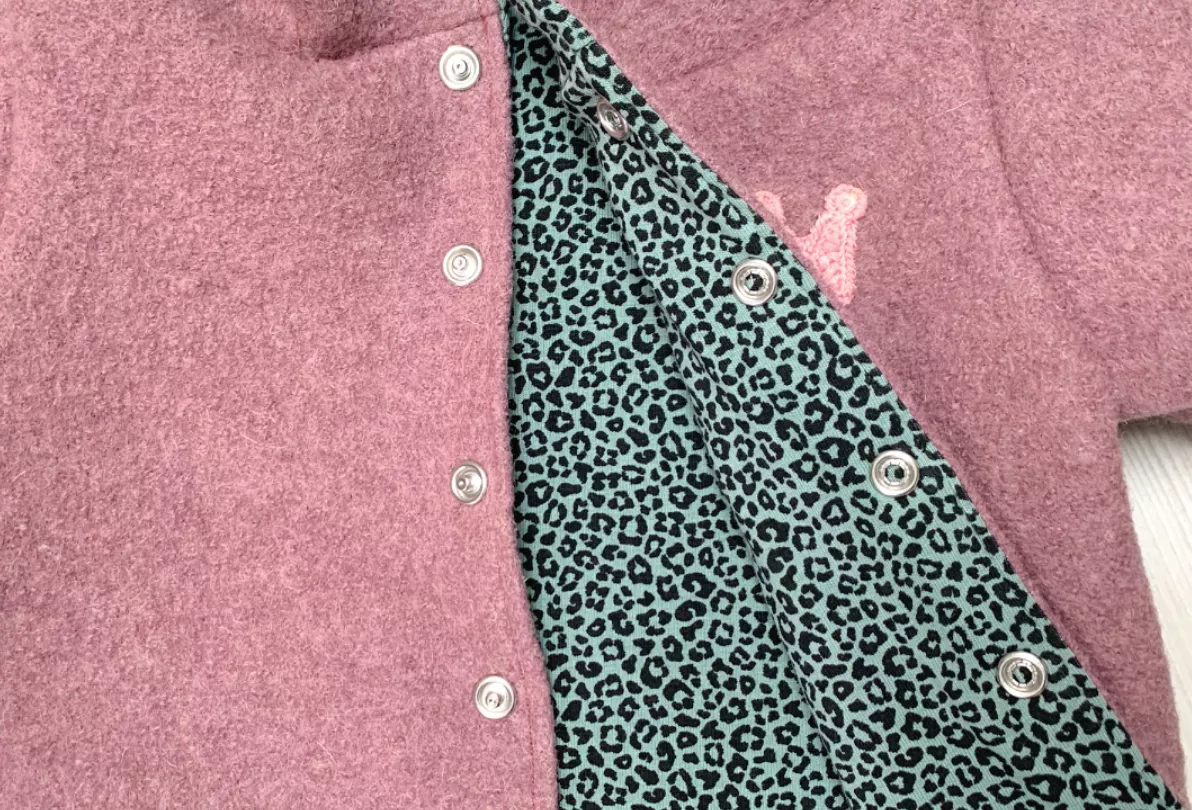
Step 24: Position the buttons. Place the female buttons (with hole) on the side that will be on top after closing. Sewing on the buttons is then easier.
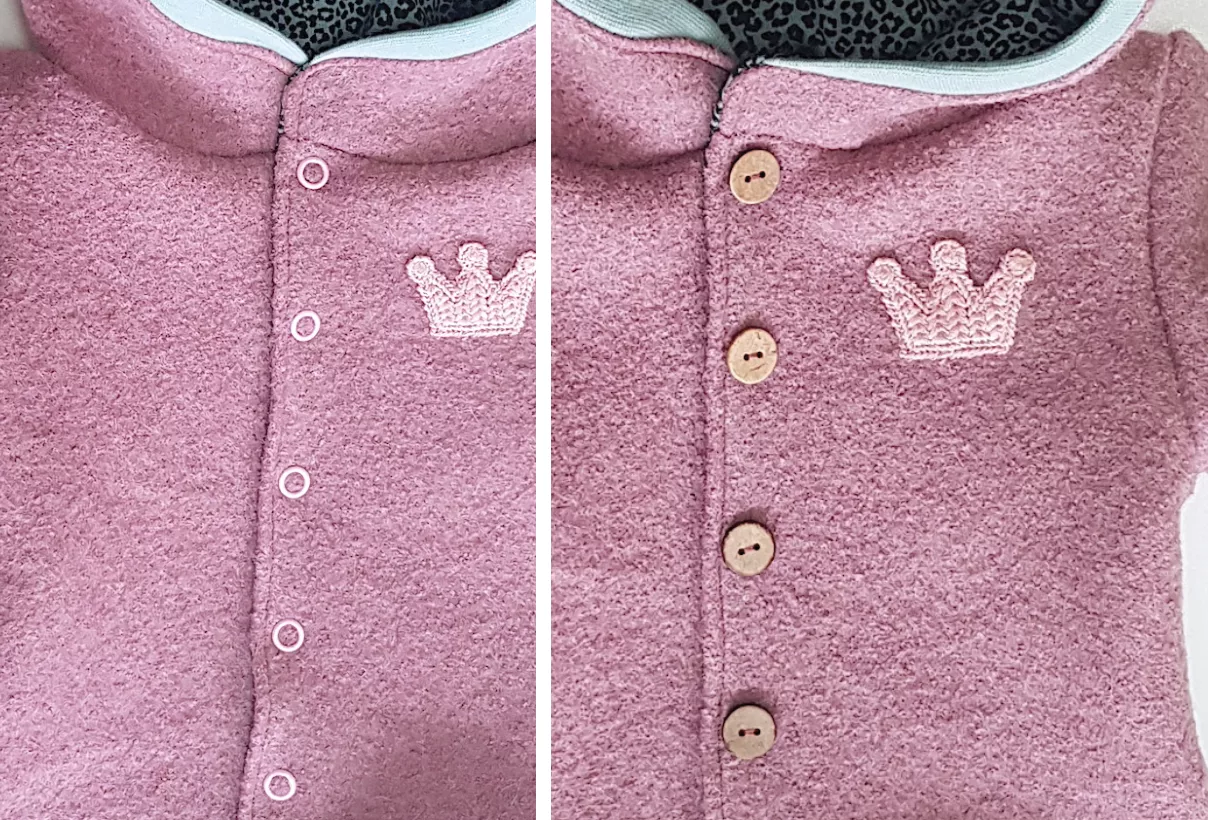
Step 25: Trick 17 for those who don't want to sew buttonholes: the wooden buttons can be sewn onto the jersey pushers.
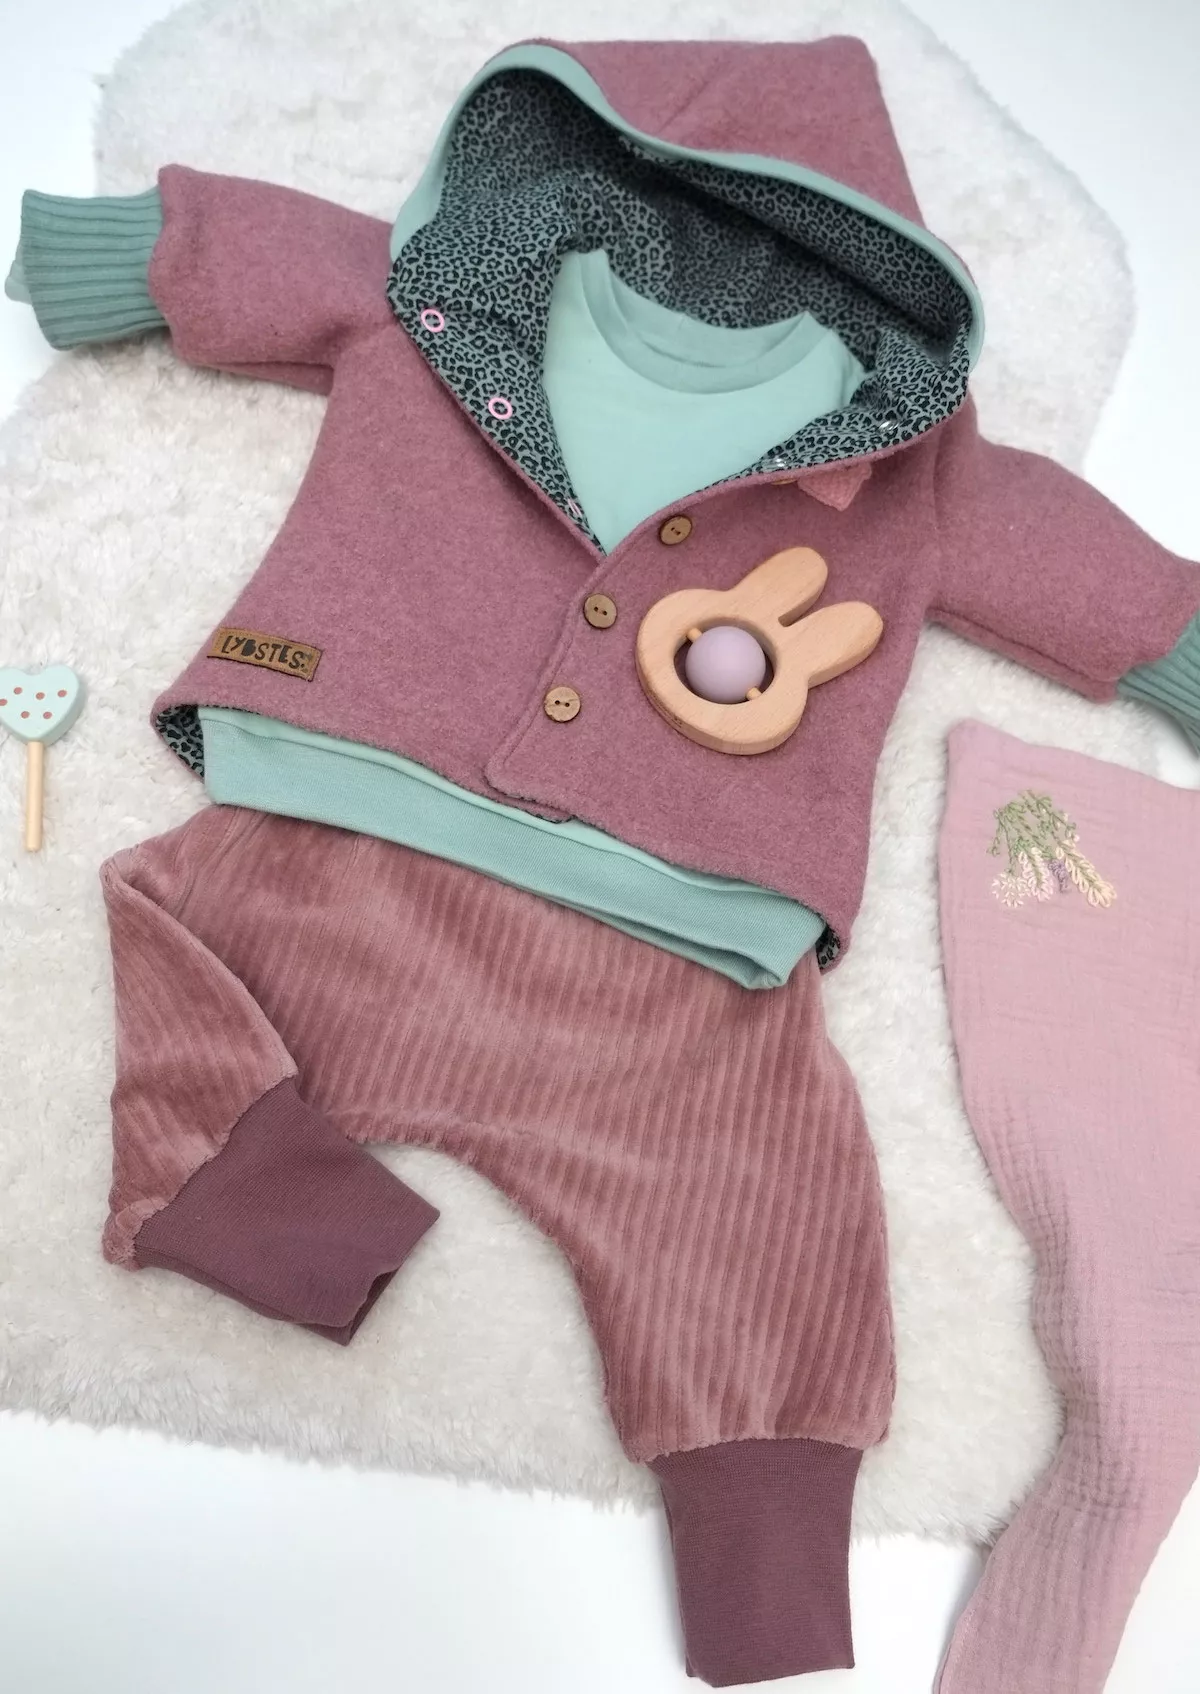
In the end, I added a small, simple jumper and the pump trousers 2.0 in jersey wide corduroy look. I think that when you mix such great different materials, such as whale and wide corduroy (jersey), then it can also be without subdivisions and tiddlywinks. Then the material mix stands for itself!
Whether colourful or plain - wooden buttons and walk always fit!
Lybste Grüße
Ronja
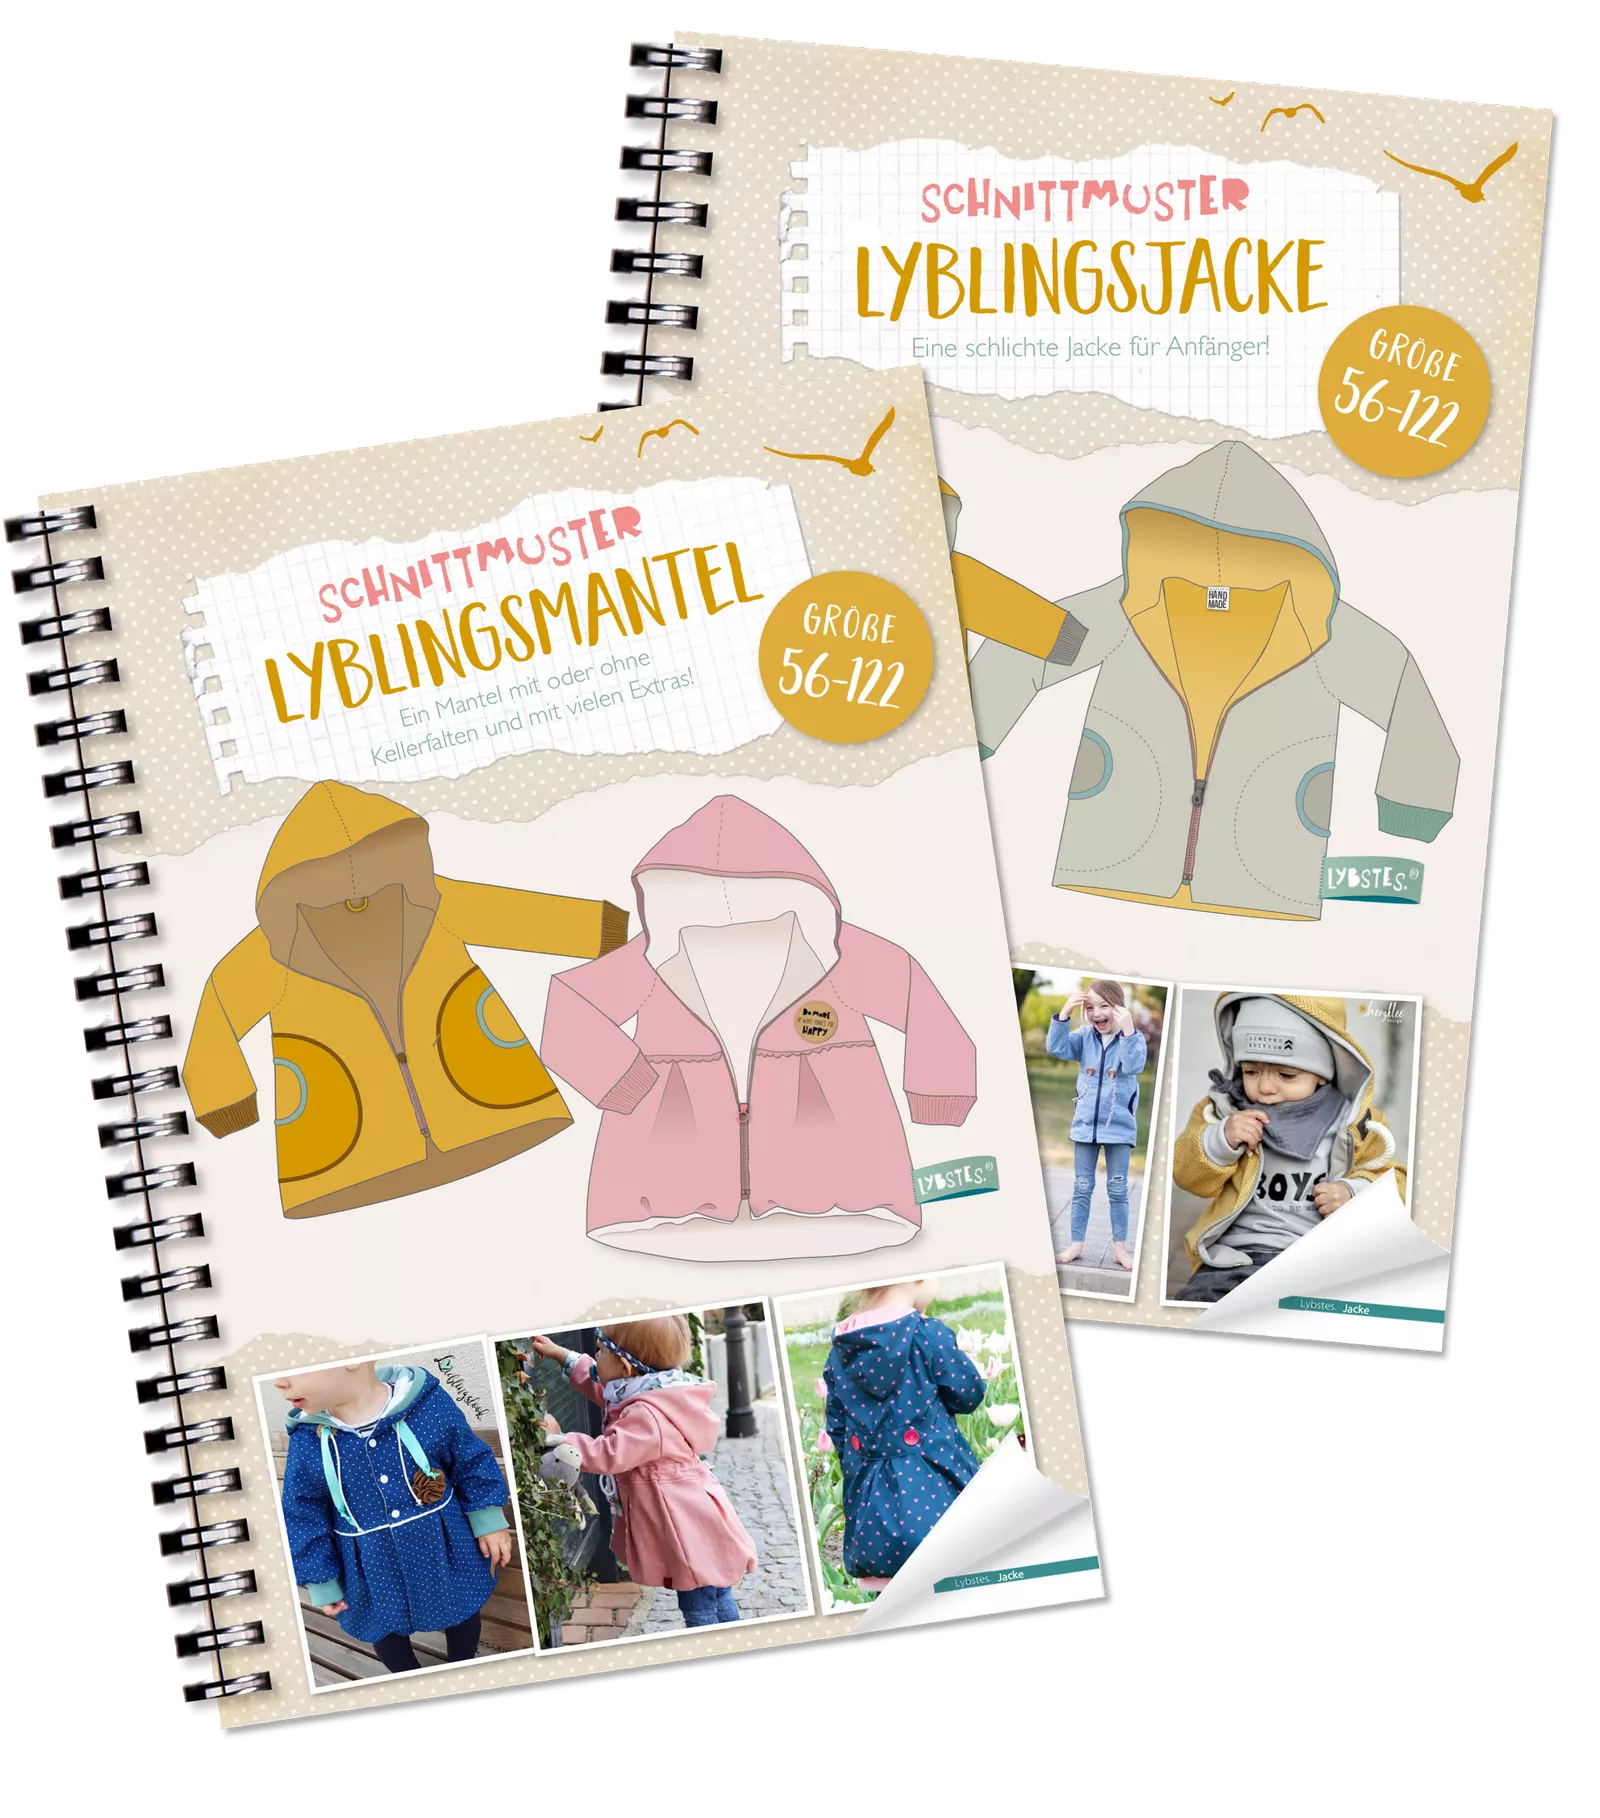
Lyblings jacket available in the shop!
Of course, the "Lyblingsjacke" is also available in the larger sizes in the shop. The small sizes 56 - 122 and the kids sizes (sizes 128 - 164) are available as a complete e-book with all the trimmings everything!
To keep everything nice and clear - in the e-book as well as in the pattern - I decided to split the Lybling jacket into two e-books.
There is an e-book for the plain Lyblings jacket and the e-book for the Lyblings coat, with lots of details and extra instructions.